

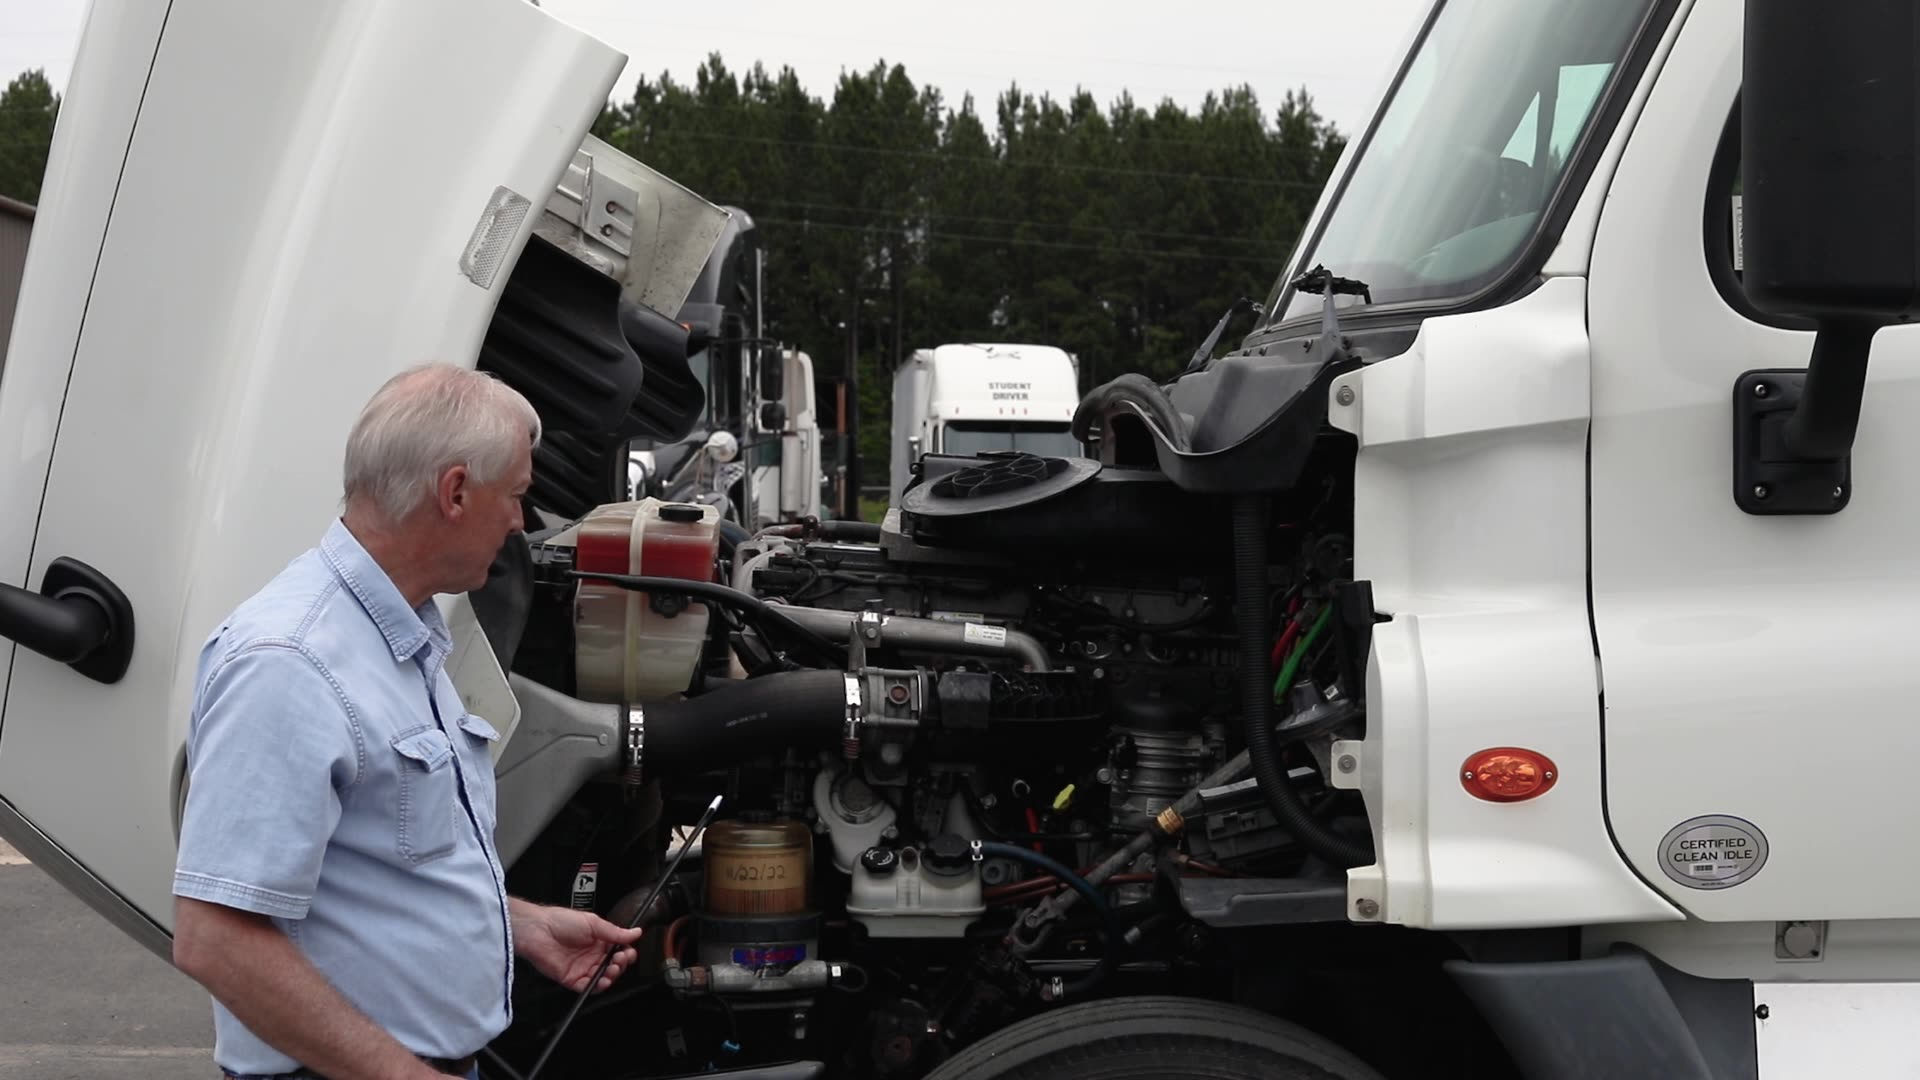
The pre-trip inspection is a required safety check that every commercial truck driver must complete before operating their vehicle. Federal regulations require drivers to inspect their vehicles before every trip, and a thorough inspection protects you, your cargo, and everyone else on the road. That is why the pre-trip inspection is a big part of your Class A CDL training and is one of the three portions of the CDL exam.
This guide walks you through each step of the inspection exactly as demonstrated by a TransTech instructor. Keep in mind that there can be subtle differences between trucks, but if you learn this process well, you will be prepared for any vehicle you drive.
Before You Begin
- Walk around the truck and look for any puddles on the ground. Check for dripping fluids coming from the engine or transmission.
Front of the Truck
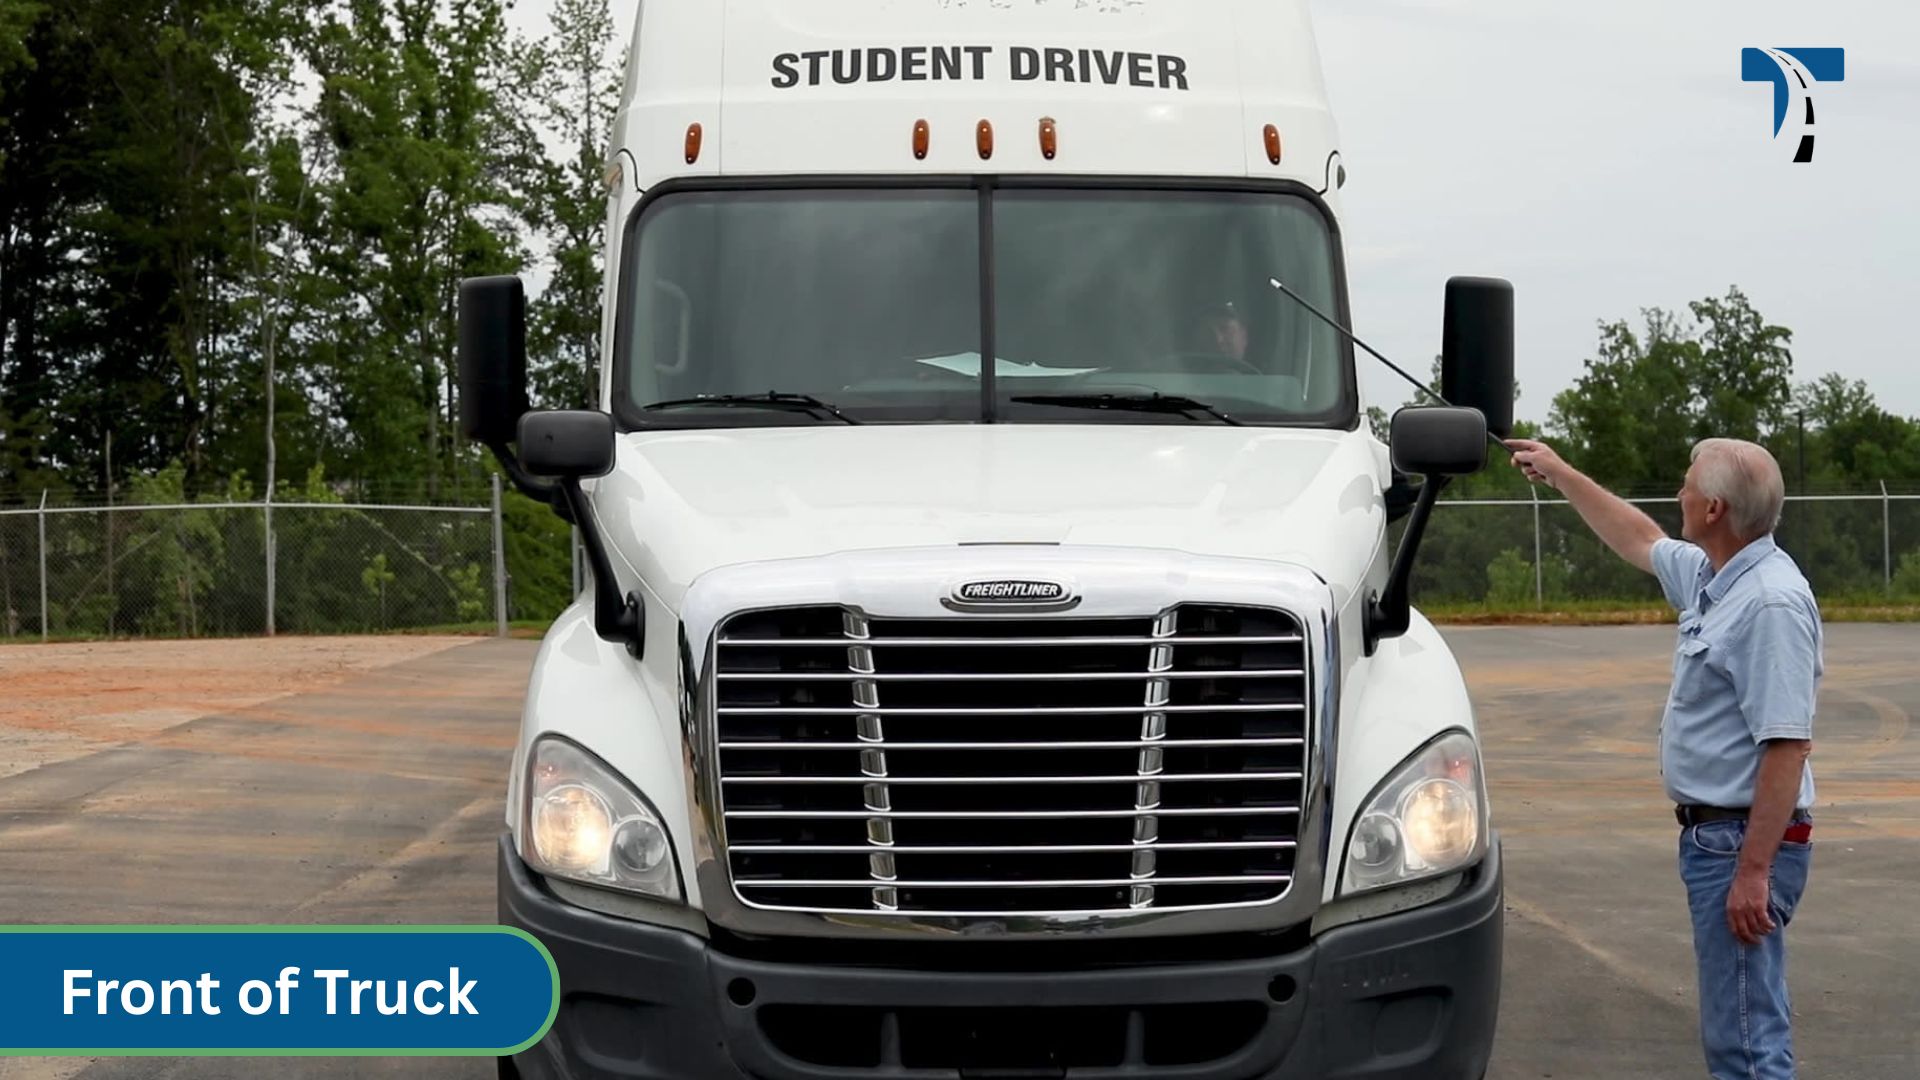
- Check the clearance lights and turn signals. They should be amber in color, not cracked or broken, clean, and working properly.
- Check the headlights — both high and low beam. They should be clear in color, not cracked or broken, and fully functional.
Under the Hood
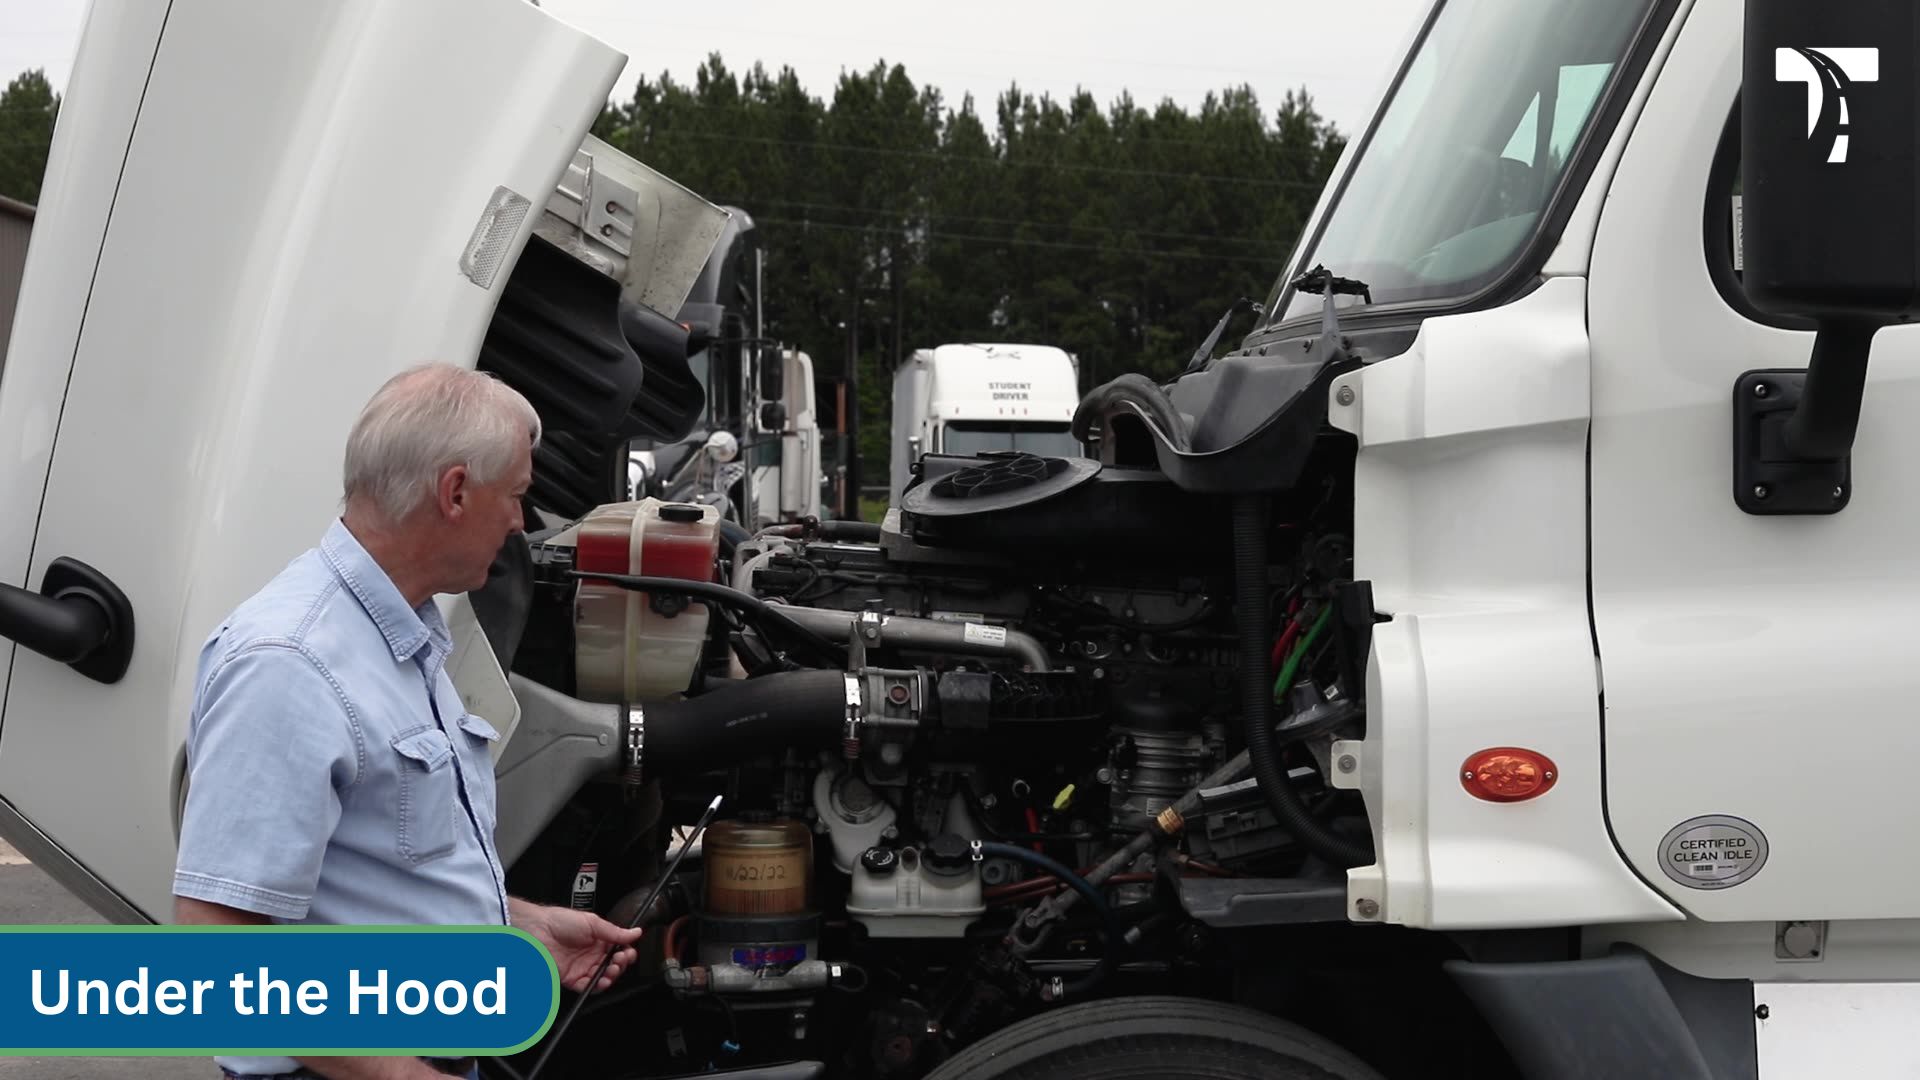
- Raise the hood. Starting on the right side of the engine, inspect all hoses and lines. They should not be ripped, torn, or broken, and there should be no leaks.
- Check the alternator. It should be securely mounted, operating properly, and free of damage.
- Check the exhaust. It should be securely mounted with no leaks, excessive rust trails, soot, cracks, dents, or holes.
- Check the water pump. It should be securely mounted, operating properly, and free of leaks or damage. If it is belt-driven, the belt should not move more than half to three-quarters of an inch
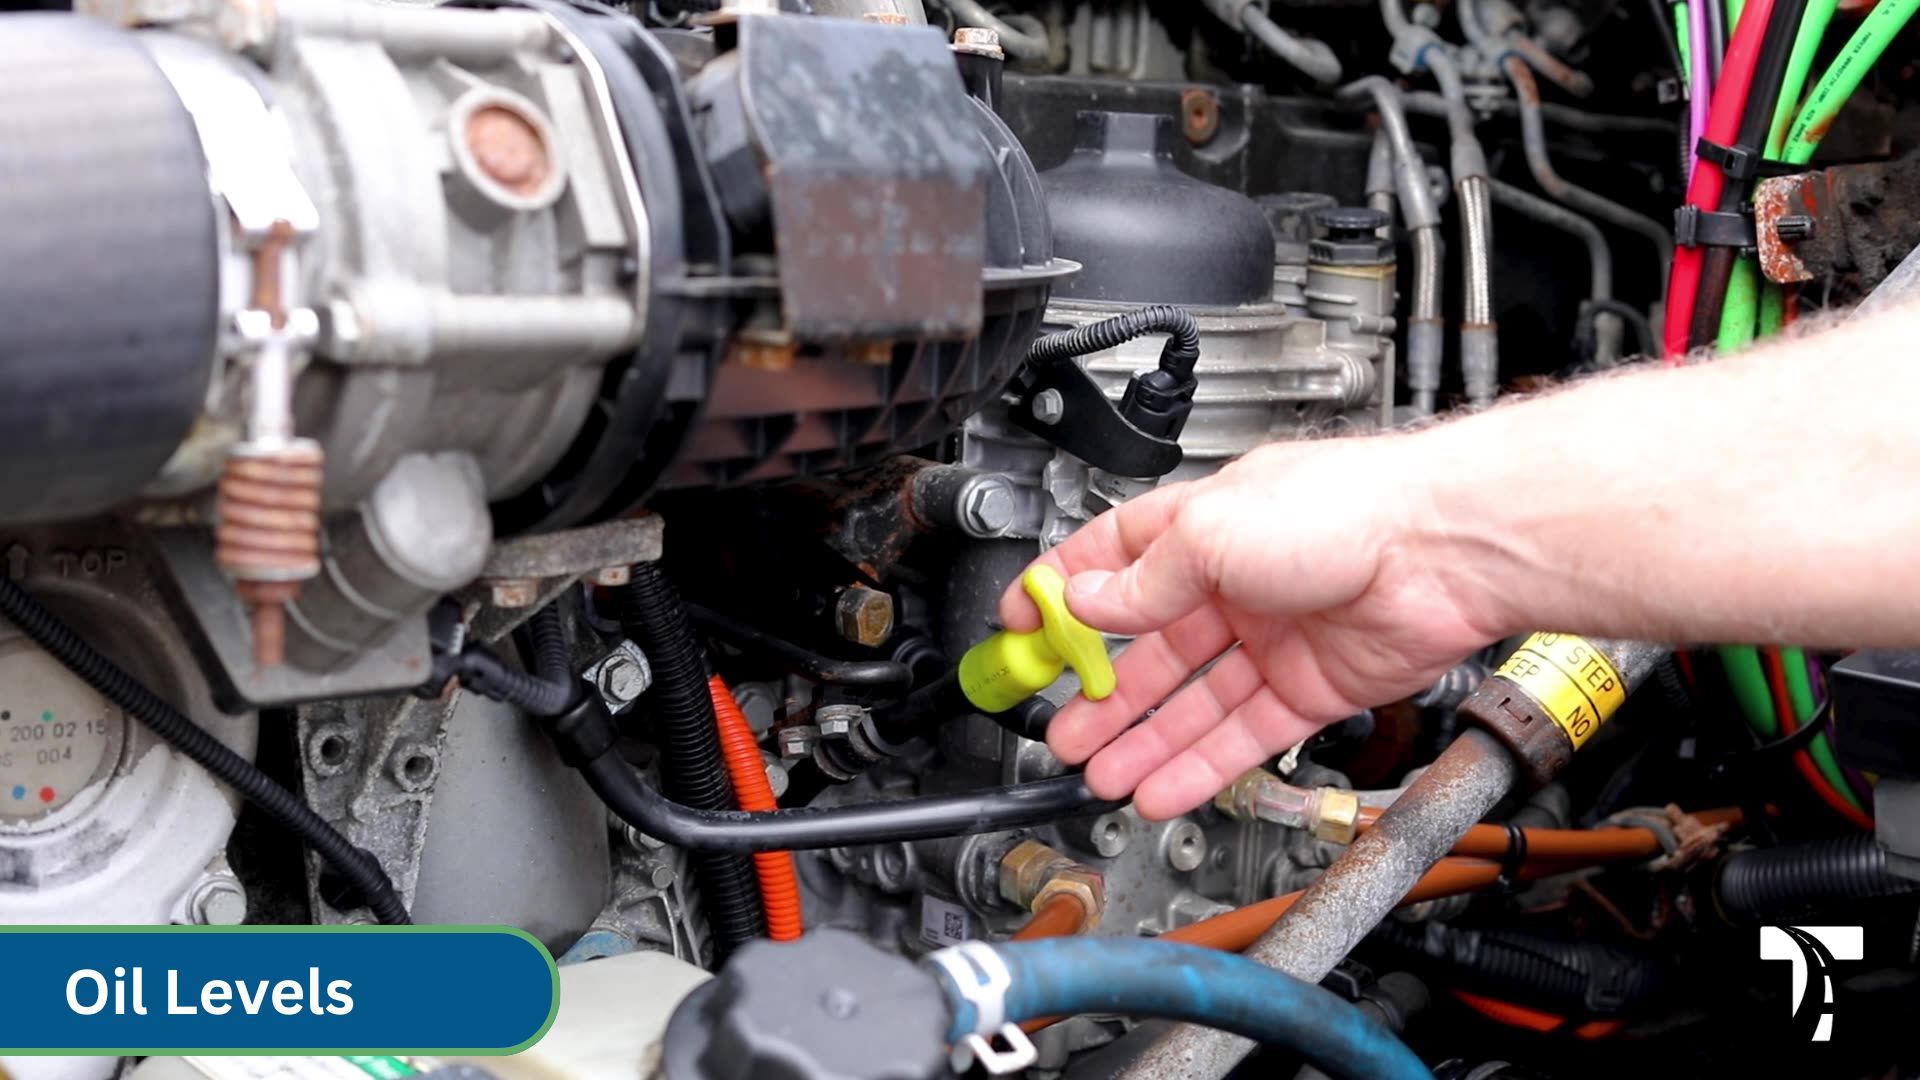
- Check the oil level. The oil must read between ADD and FULL on the dipstick. If it is at the ADD mark, add oil before driving.
- Check the coolant level. It should read between ADD and FULL. If it is low, add coolant before driving.
- Check the air compressor. It should be securely mounted, properly operating, undamaged and leak-free, and gear-driven.
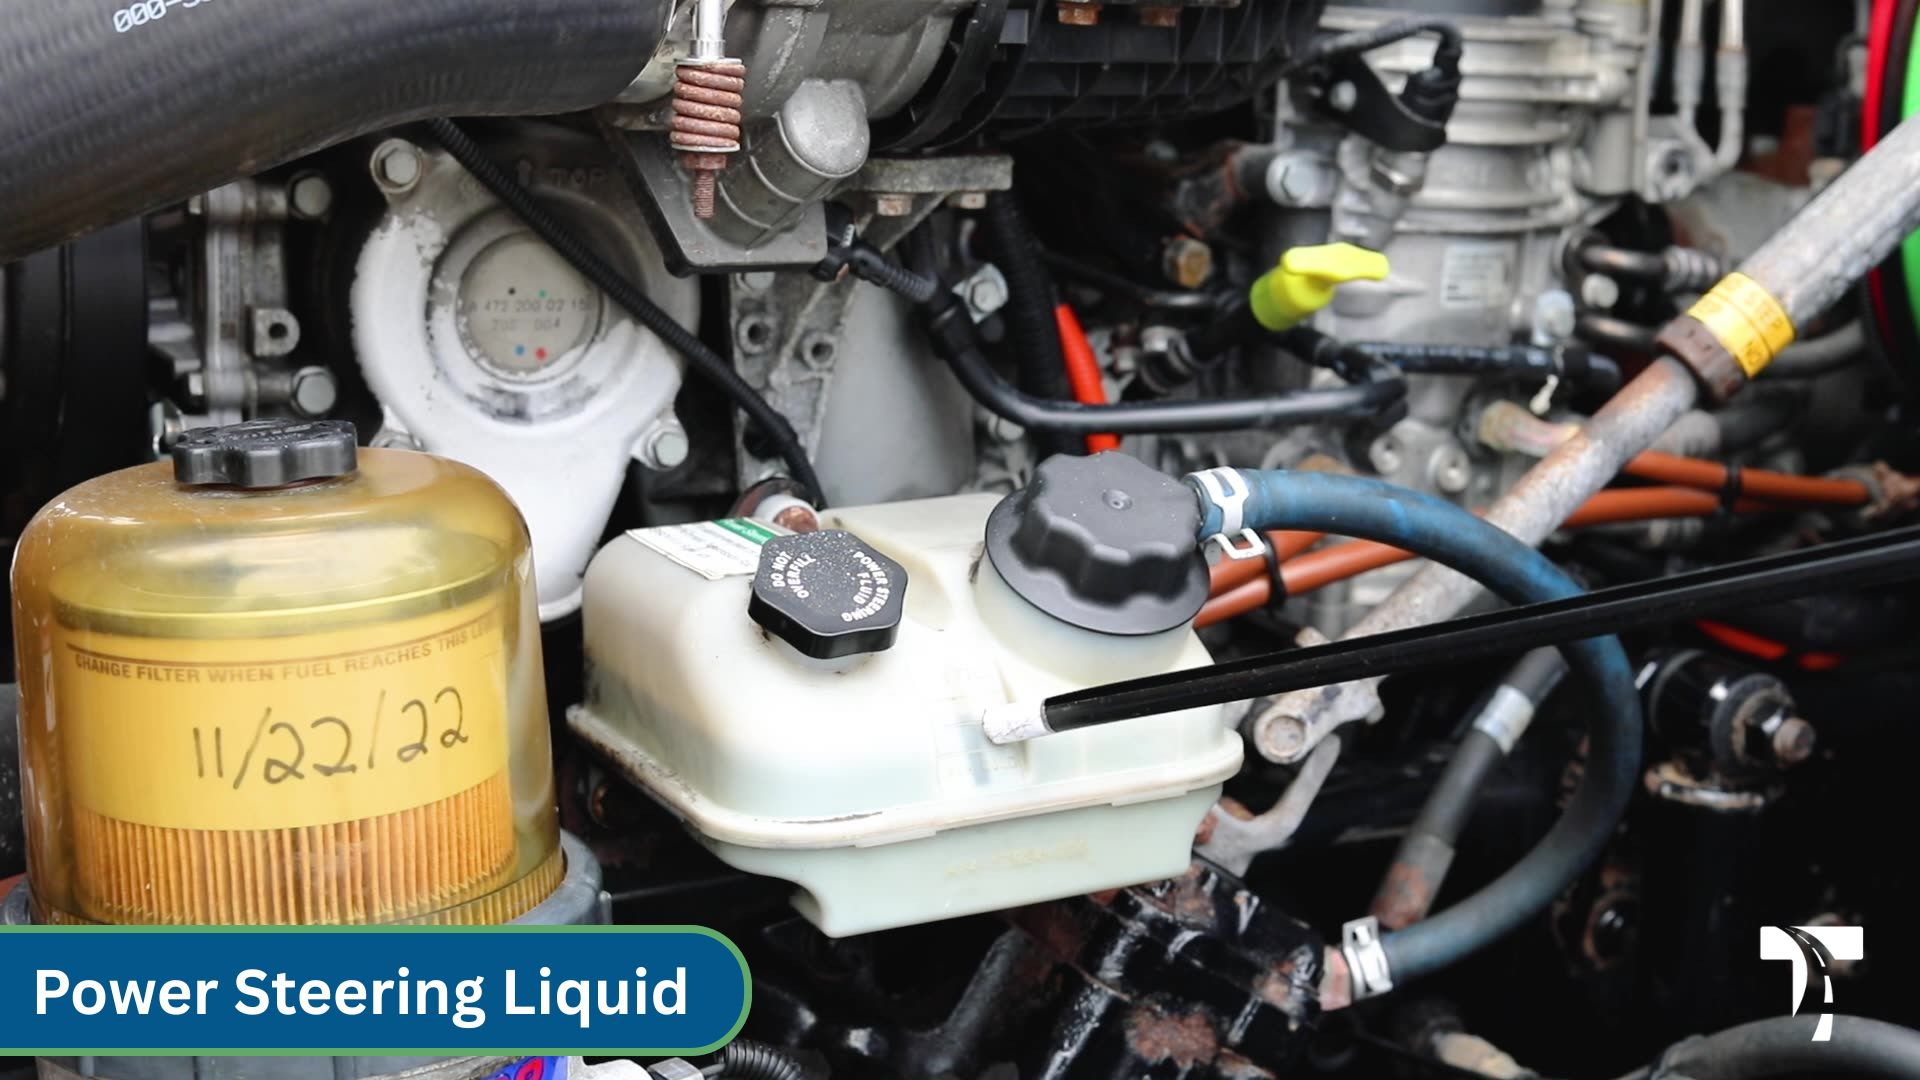
- Check the power steering fluid level. It should read between ADD and FULL.
- Check the gearbox. It should be securely mounted, undamaged, and leak-free, with no missing nuts or bolts.
Front Steering & Suspension
- Turn the wheel so you can see the inside of the front wheel properly.
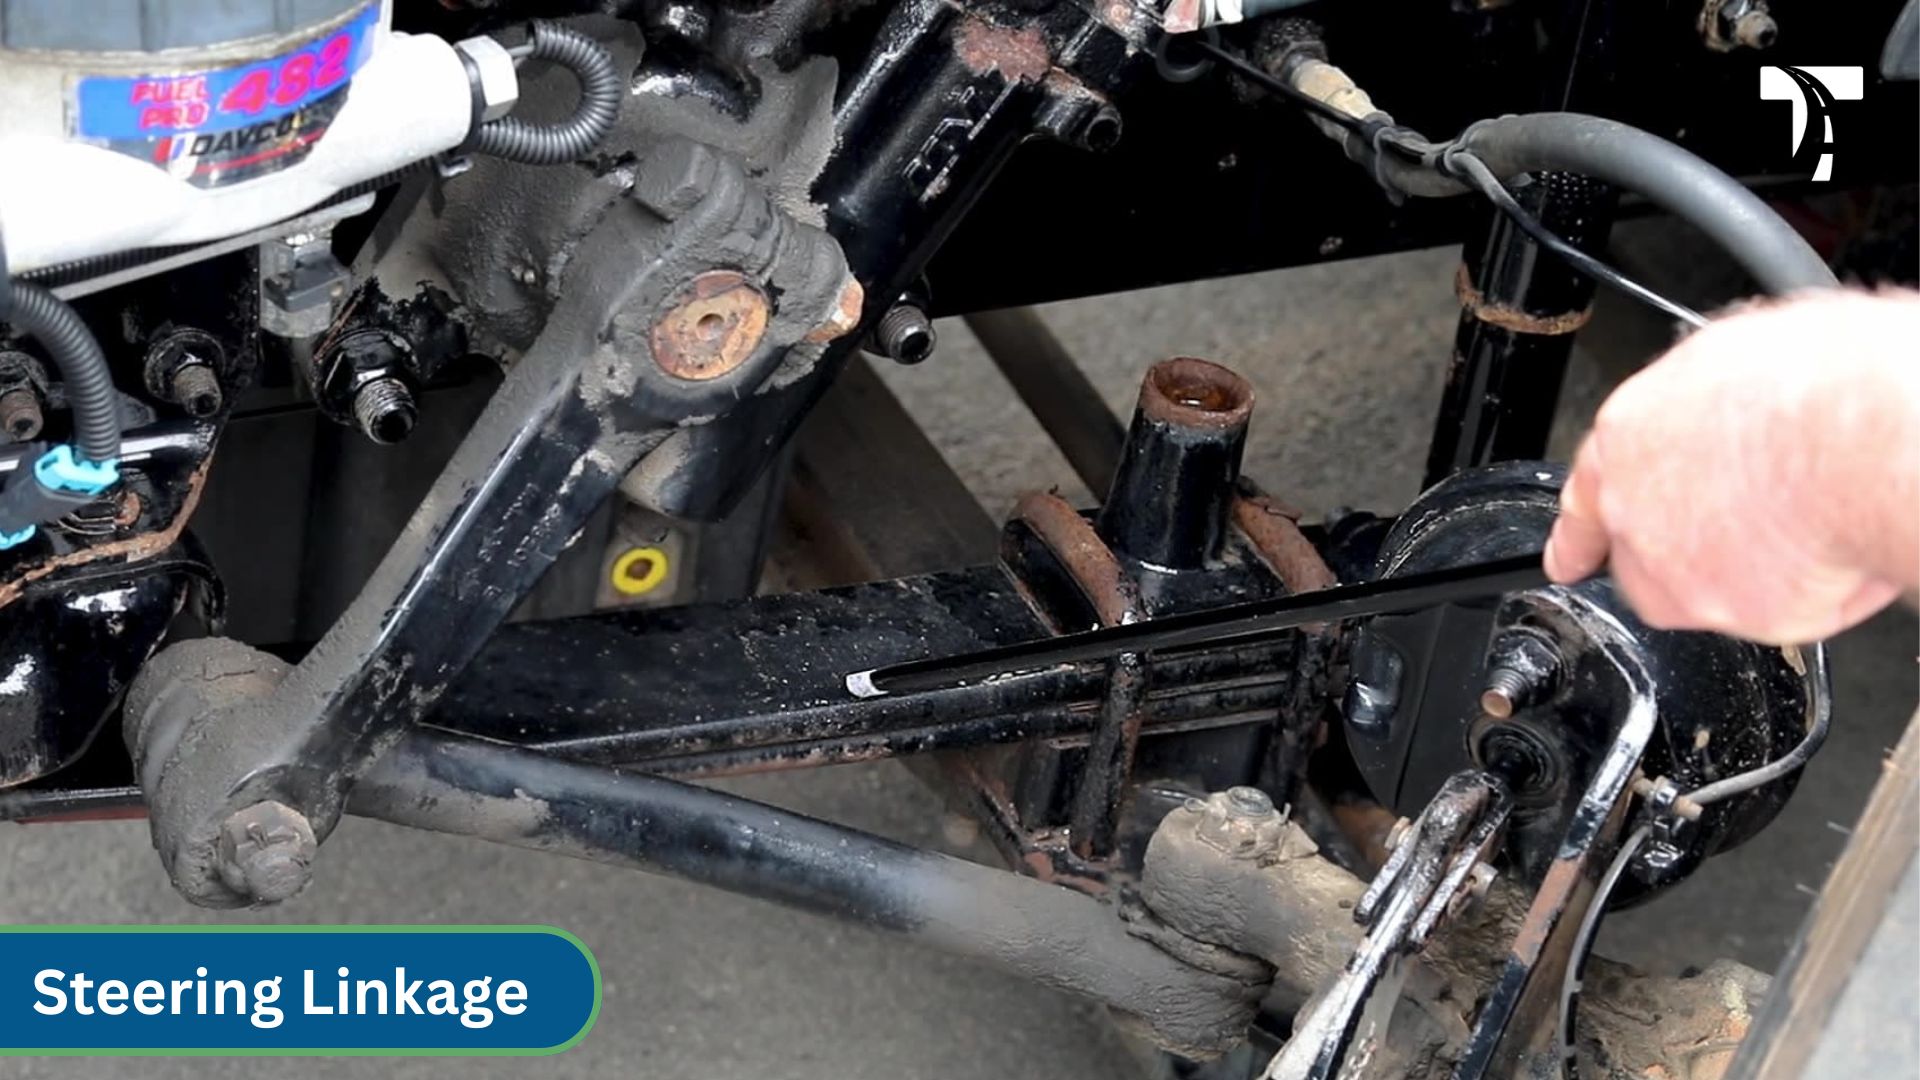
- Check the steering linkage. The arms and rods should not be worn or cracked. Joints and sockets should not be worn or loose. There should be no missing nuts, bolts, or cotter pins.
- Check the suspension springs. They should not be cracked, broken, loose, or have missing bolts. Springs should be held together by two tight U-bolts.
Front Braking System
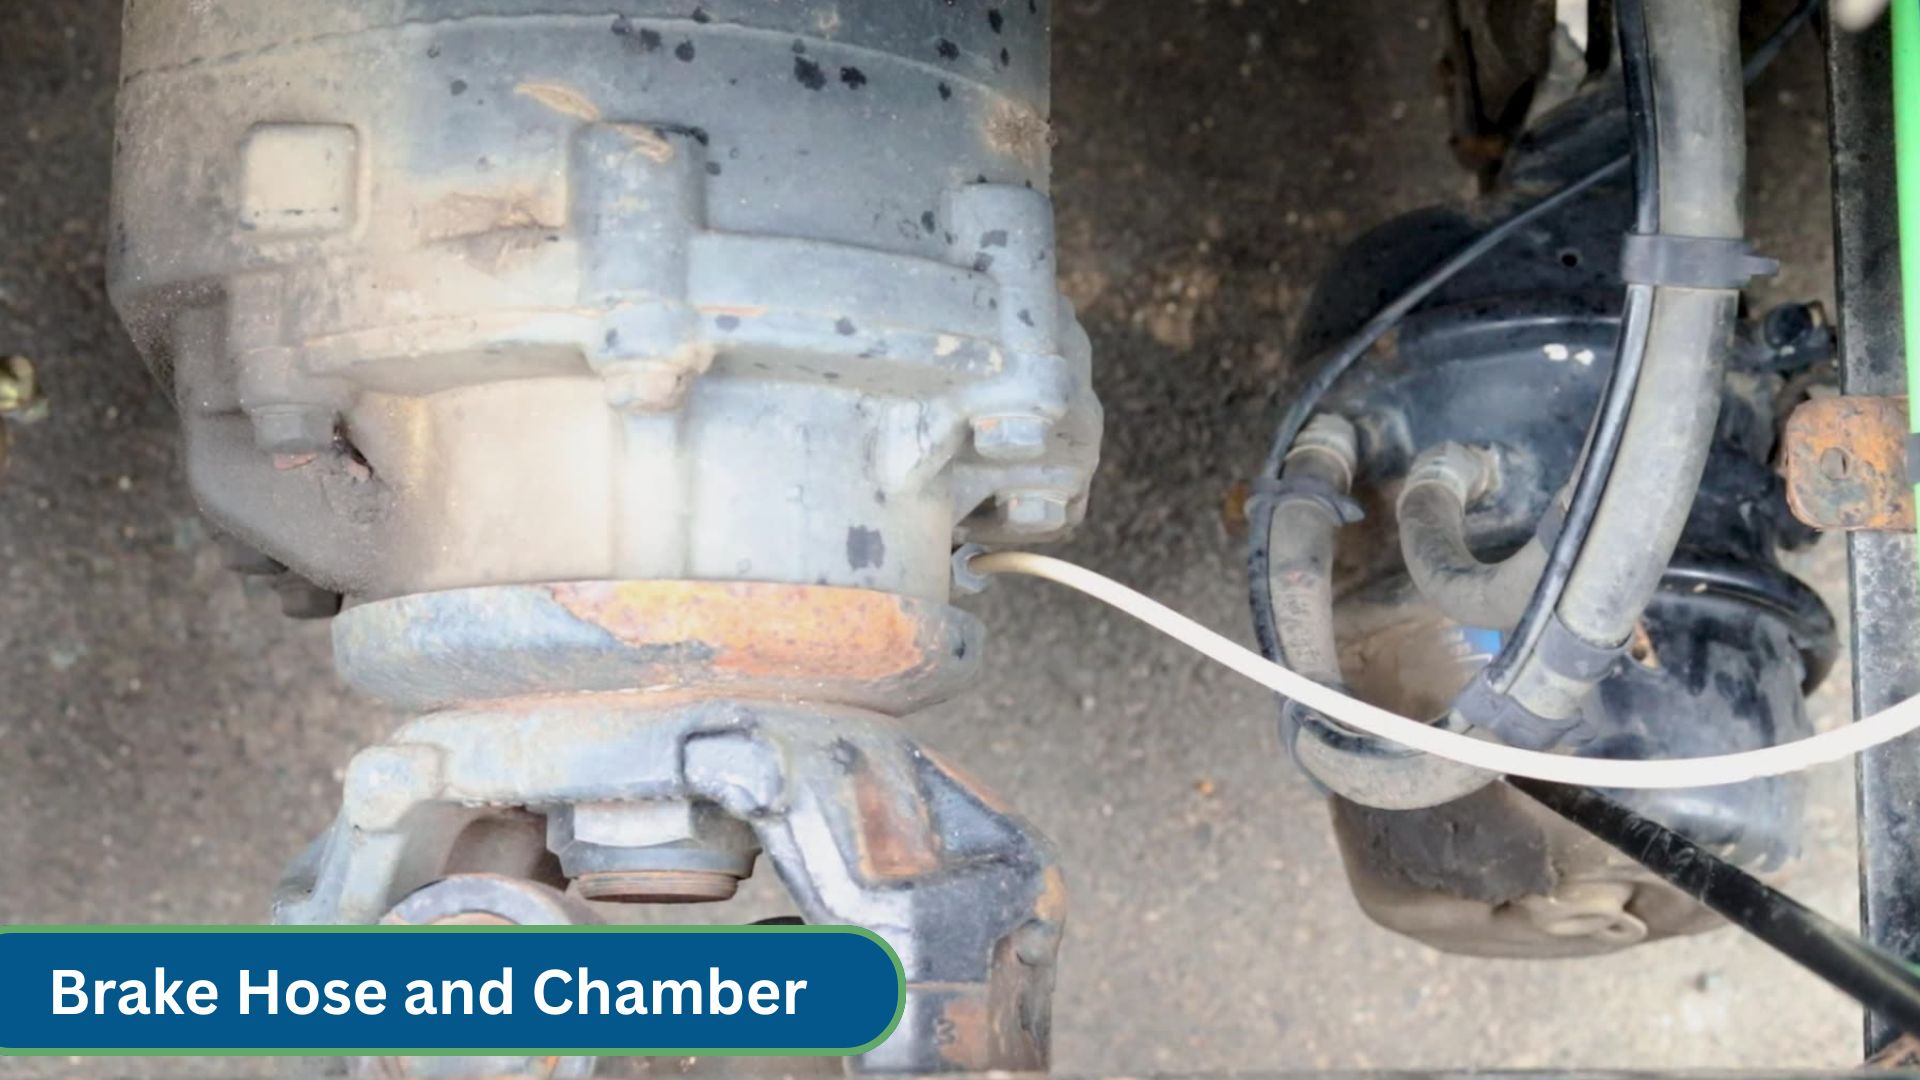
- Check the brake hoses for cracks, leaks, or signs of dry rot.
- Check the brake chamber. It should be securely mounted, not cracked, broken, leaking, or dented.
- Check the slack adjuster and push rod. They should not be bent or broken, and there should be no loose or missing parts. The slack adjuster should not pull more than 1 inch. A pull of 1 to 2 inches means it needs adjustment. Anything over 2 inches is out of service.
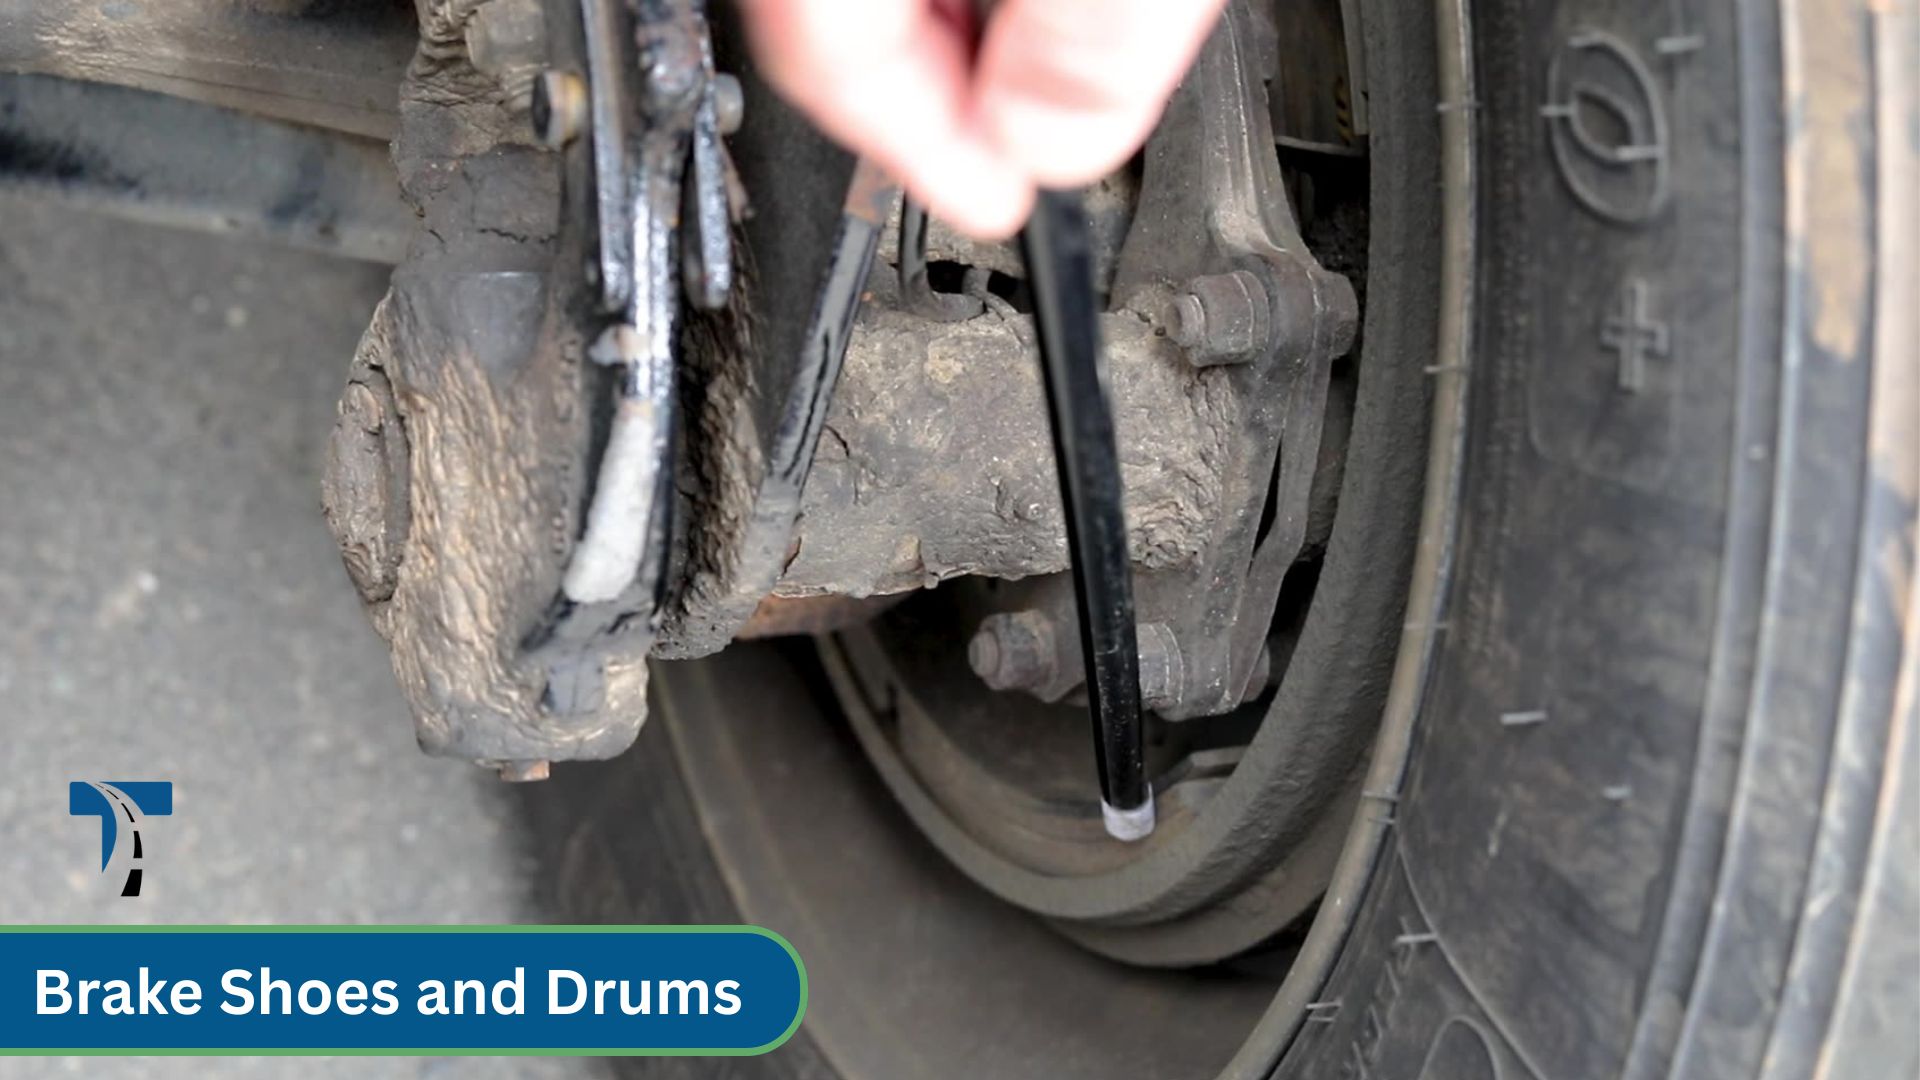
- Check the brake shoes and brake drums. There should be no oil or grease on the shoes, and there must be at least 1/4 inch of brake pad remaining. The drums should not be cracked, bent, or warped.
Front Wheels
- Check the rims. They should not be bent or cracked.
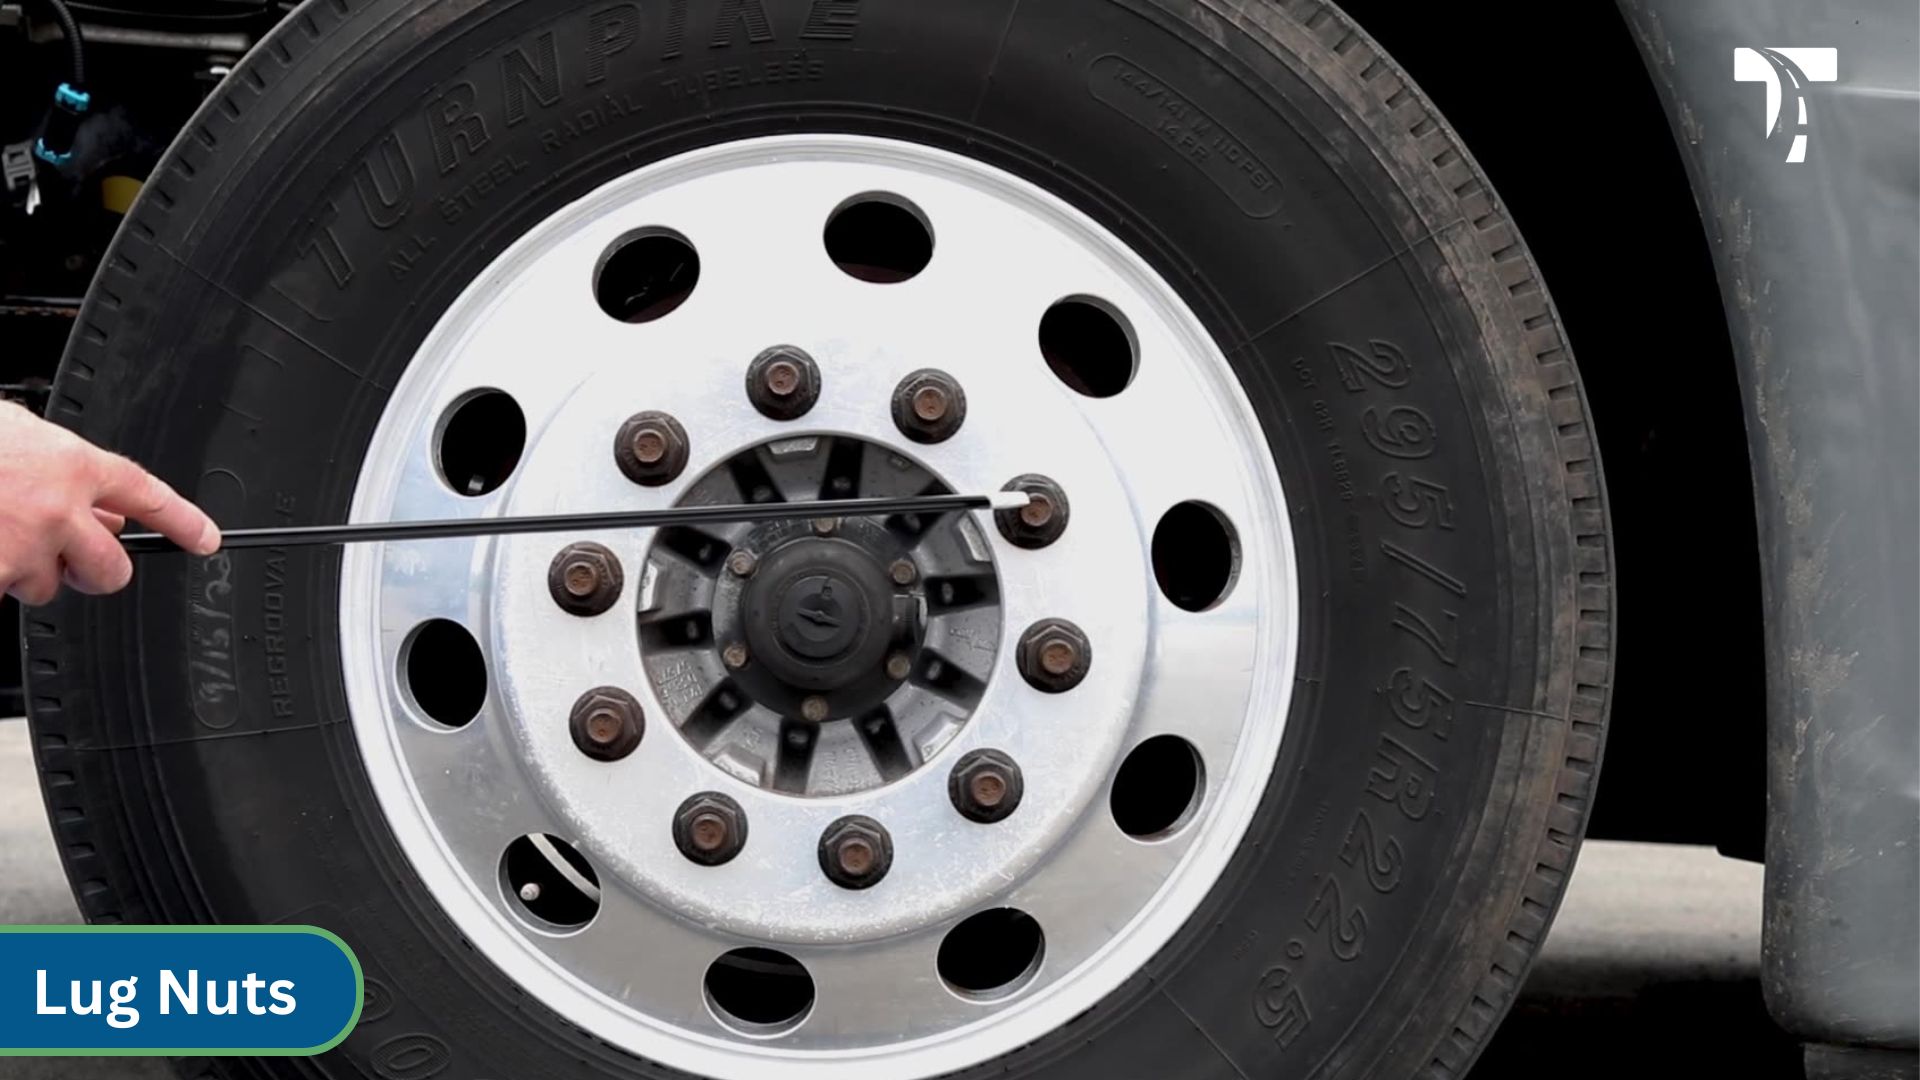
- Check the lug nuts. They should all be visibly present and tight. Look for shiny rust trails, which can indicate a loose nut.
- Check the hub seal. It should not be leaking, and the fluid level should be between ADD and FULL.
Steer Tires
- Check the steer tires for a minimum tread depth of 4/32 of an inch. Look for uneven wear or any tire separation.
- Inspect the tire sidewalls for cuts, rips, or bulges.
- Check tire pressure with an air gauge. It should read between 100 and 110 PSI.
Drive Tires
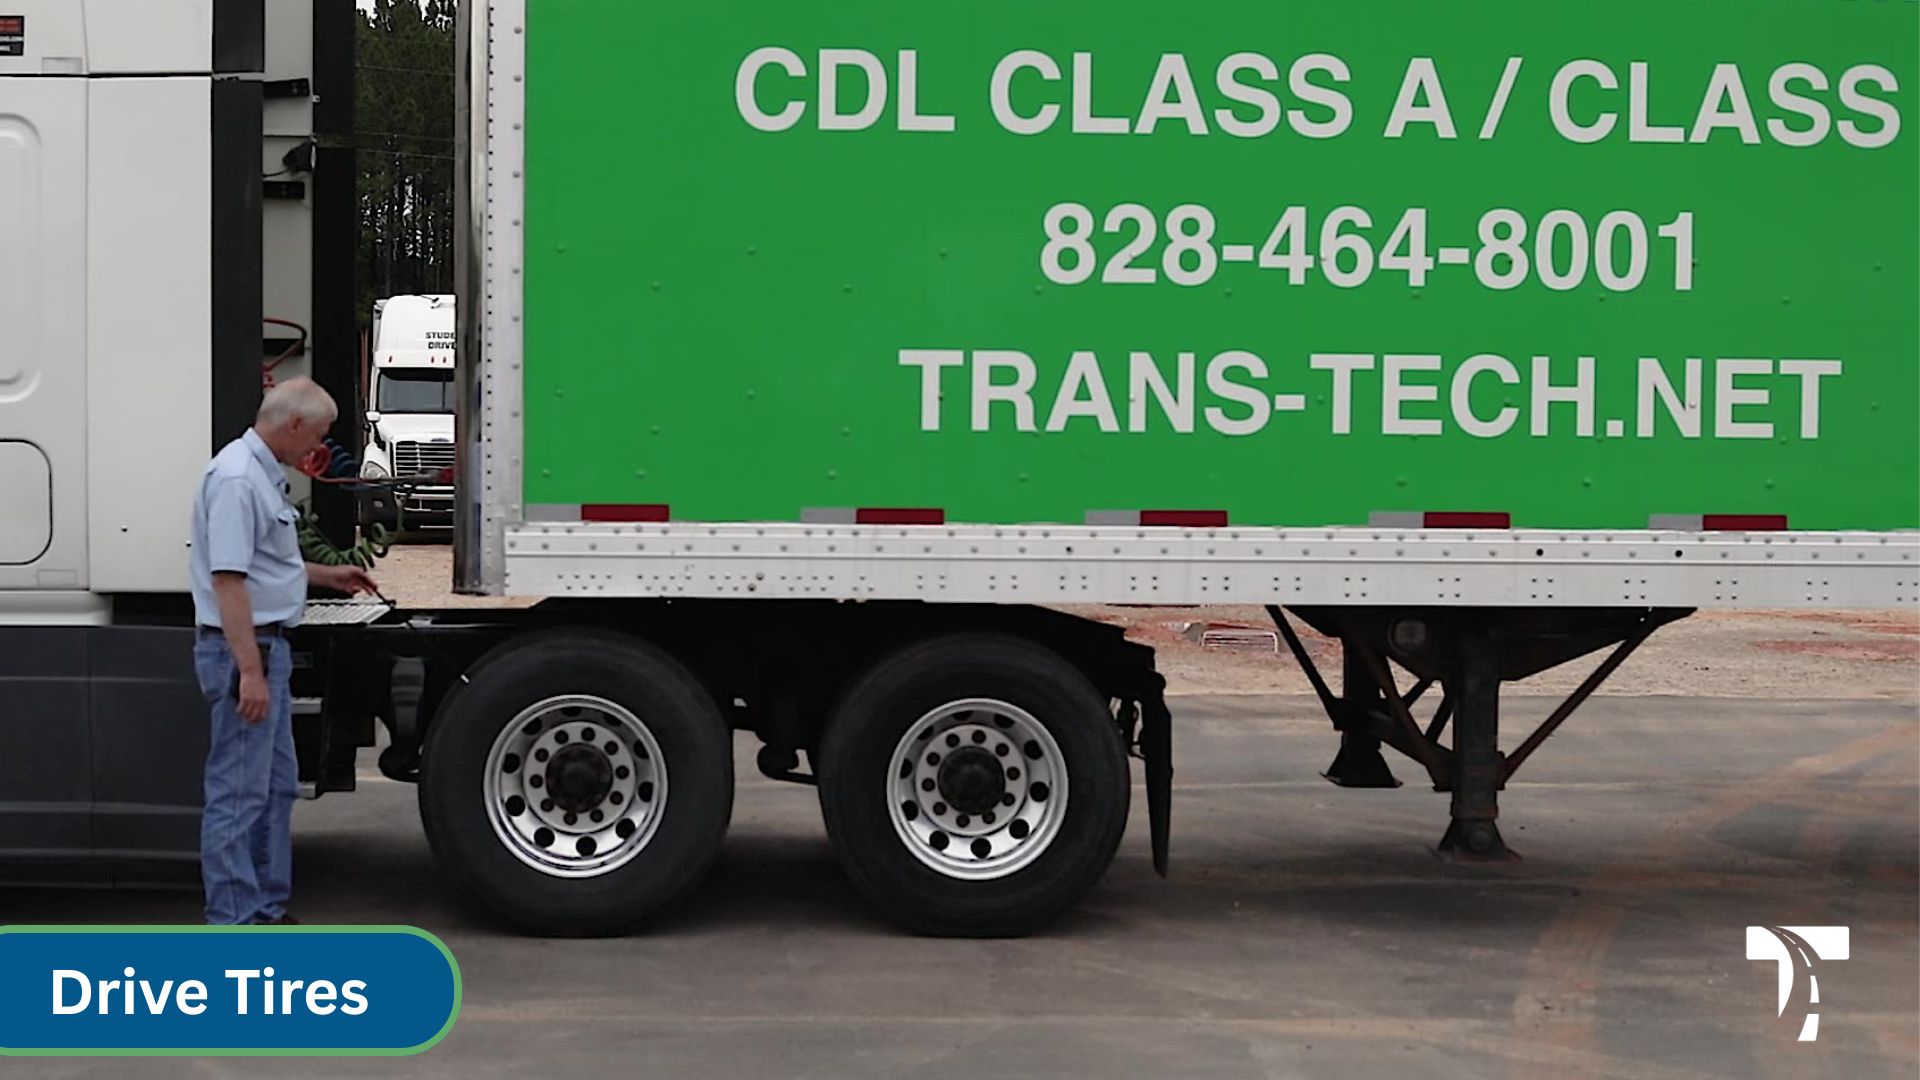
This is a bud wheel configuration.
- Check all four sidewalls for cuts, rips, or bulges.
- Check for even wear and no tread separation.
- Confirm a minimum tread depth of 2/32 of an inch.
- Check tire pressure with an air gauge. It should read between 100 and 110 PSI.
- Check the rims for bends or cracks. Inspect the spacing between tires and rims for any foreign objects and make sure the tires are not touching each other.
- Check the lug nuts. They should be visibly tight with no rust trails or shiny threads indicating a loose nut.
- Check the axle seal. It is a sealed unit — confirm there are no leaks and no loose or missing bolts.
Trailer Tires
This is a bud wheel configuration.
- Check all four sidewalls for cuts, rips, or bulges.
- Check for even wear and no tread separation across the tire.
- Check tire pressure with an air gauge. It should read between 100 and 110 PSI.
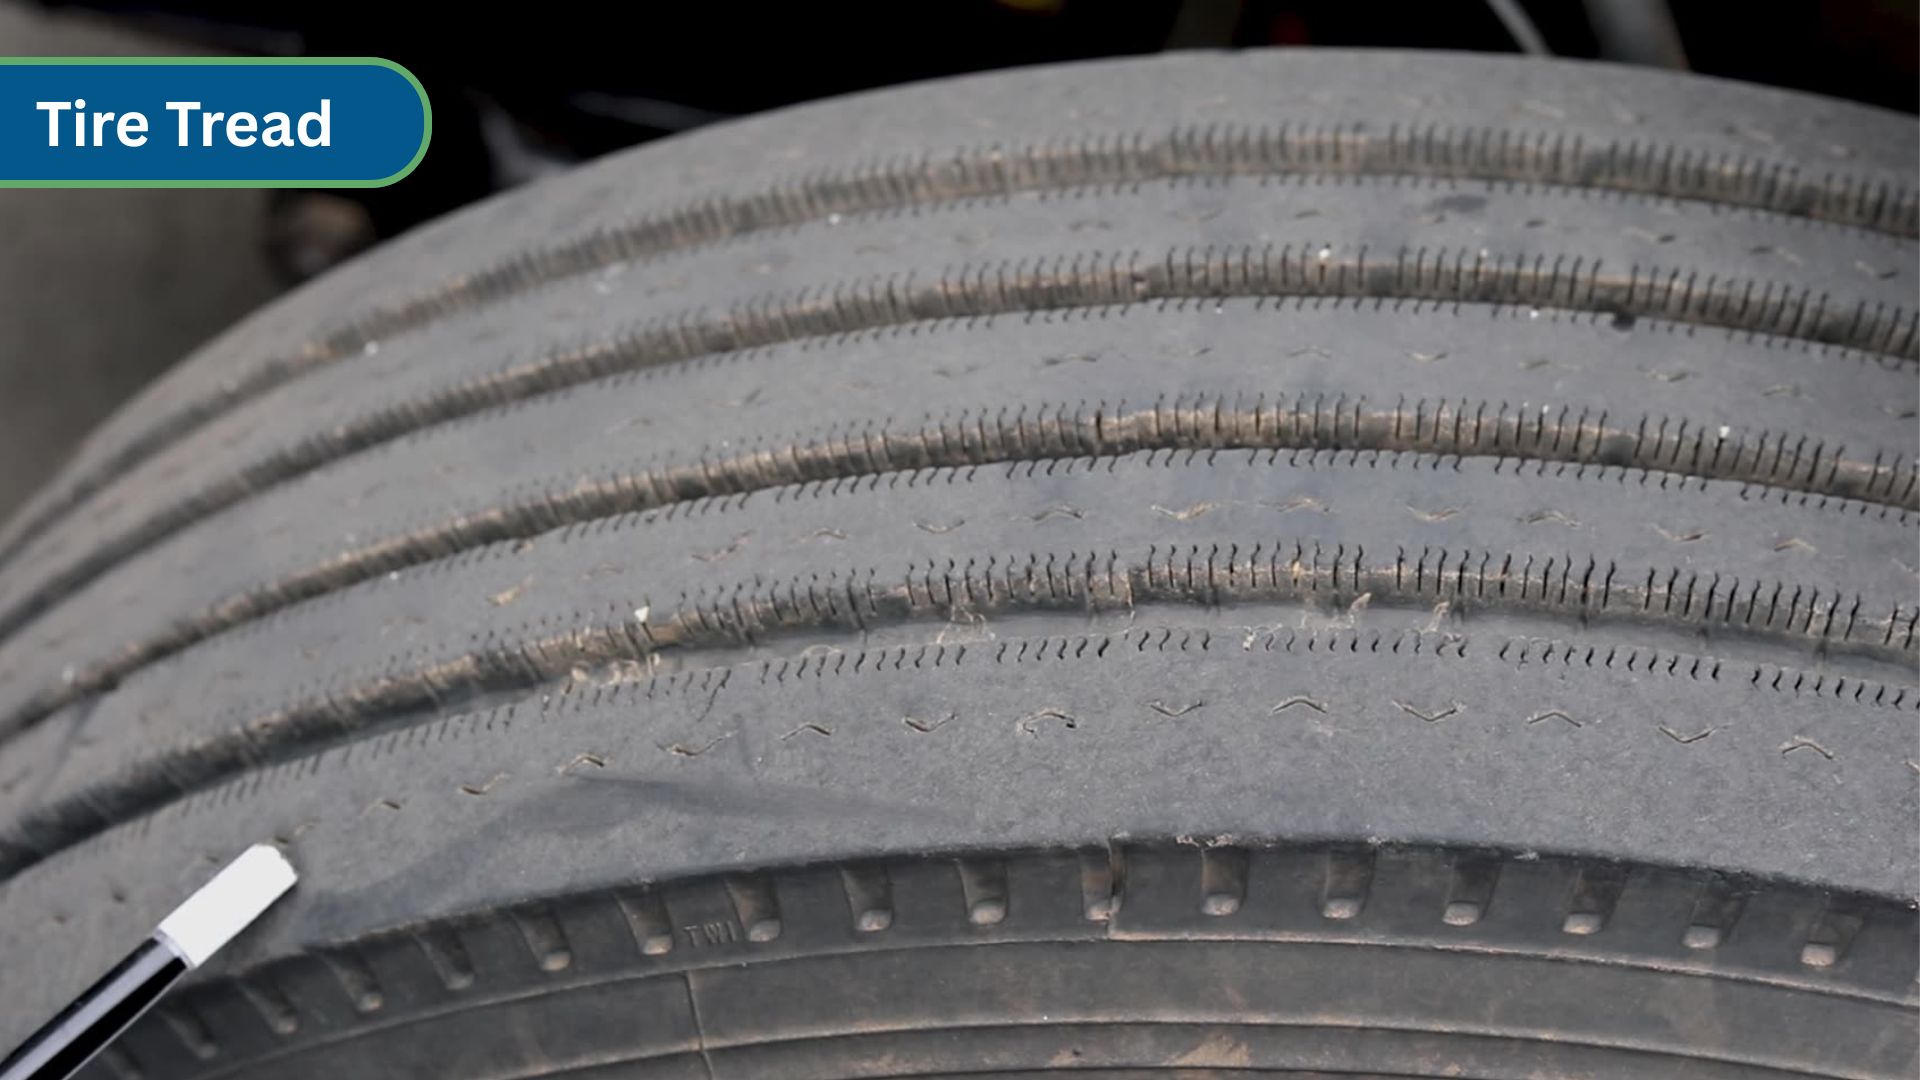
- Confirm a minimum tread depth of 2/32 of an inch.
- Check the inner, center, and outer rims for cracks or bends. Check the spacing between tires for foreign objects and confirm the tires are not touching.
- Check all lug nuts — they should be visible and tight with no rust trails or shiny threads.
- Check the hub seal. It should not be leaking and should have a proper fluid level between ADD and FULL.
Driver’s Side Exterior
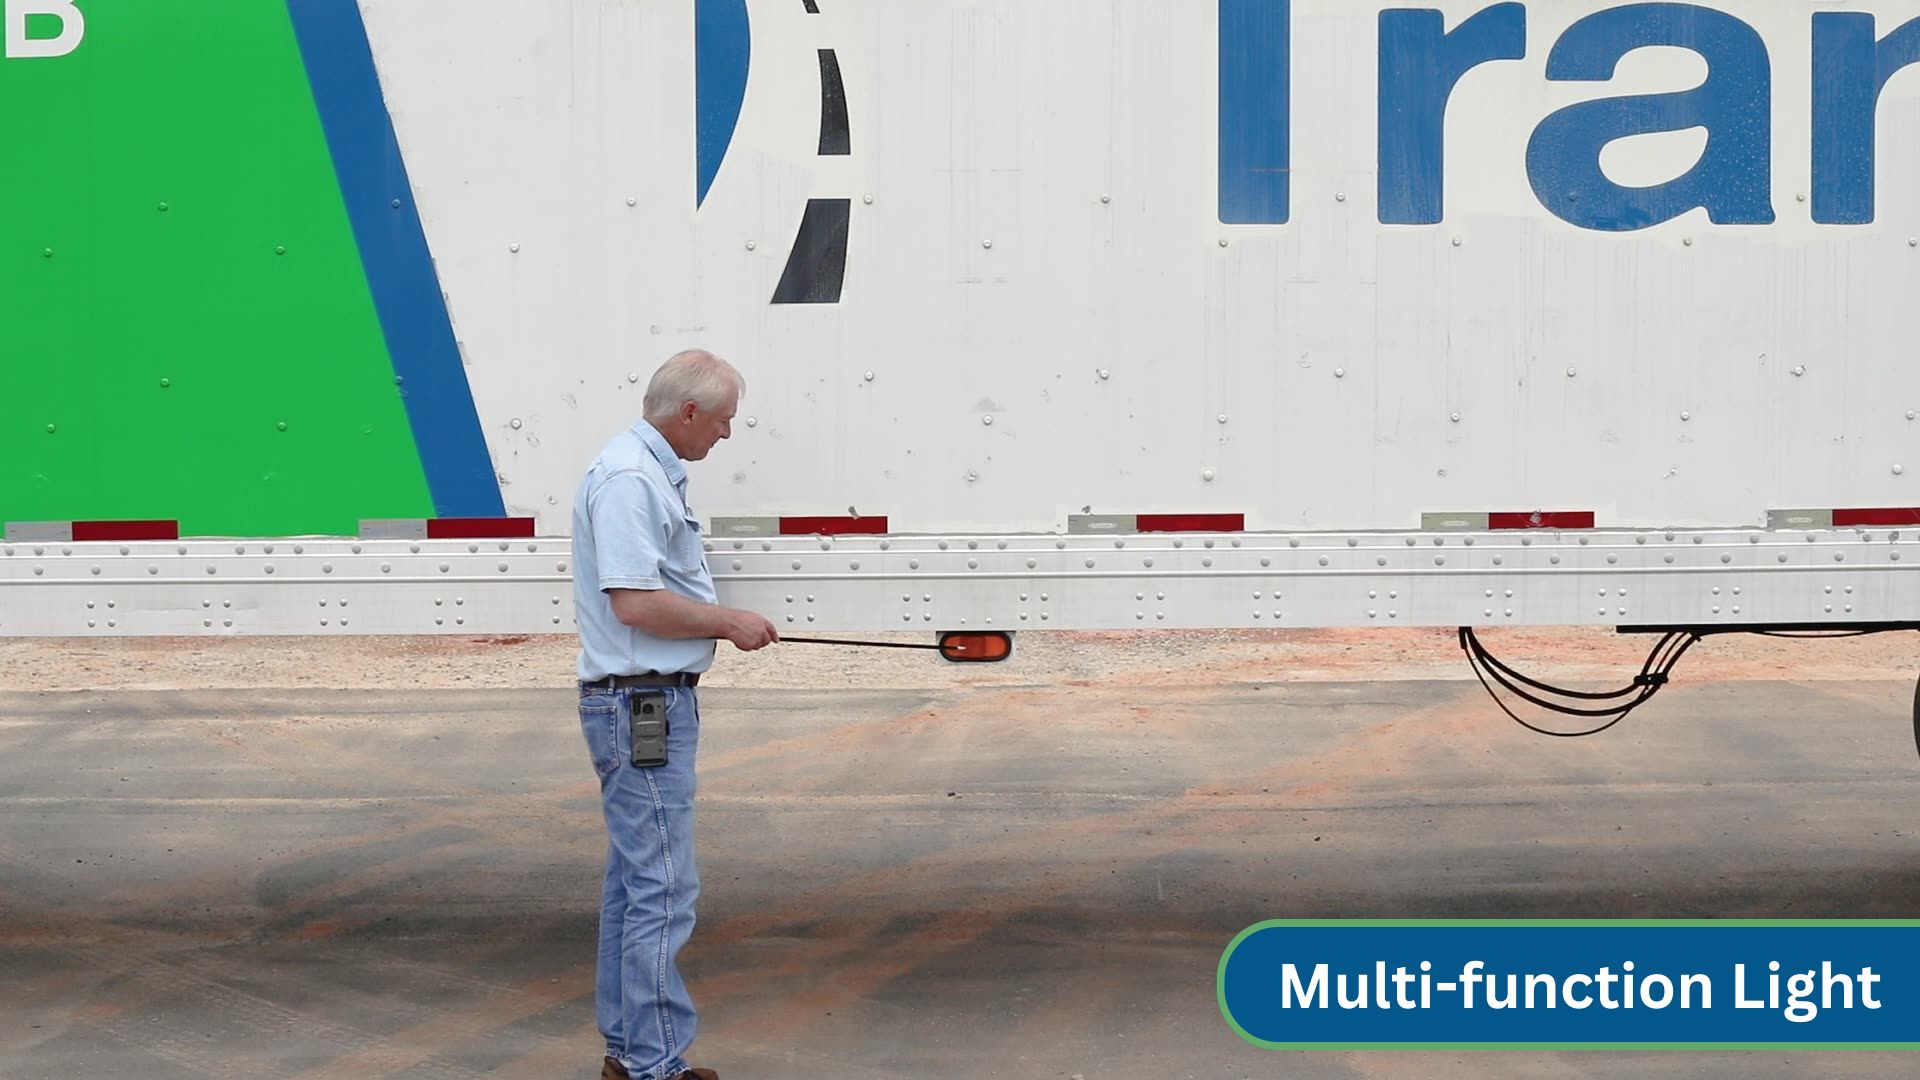
- Check the multi-function light. It is amber and serves as the left-turn signal, four-way flasher, and marker light.
- Check the mirror bracket and mirrors. They should be properly mounted, secure, and free of damage or cracks.
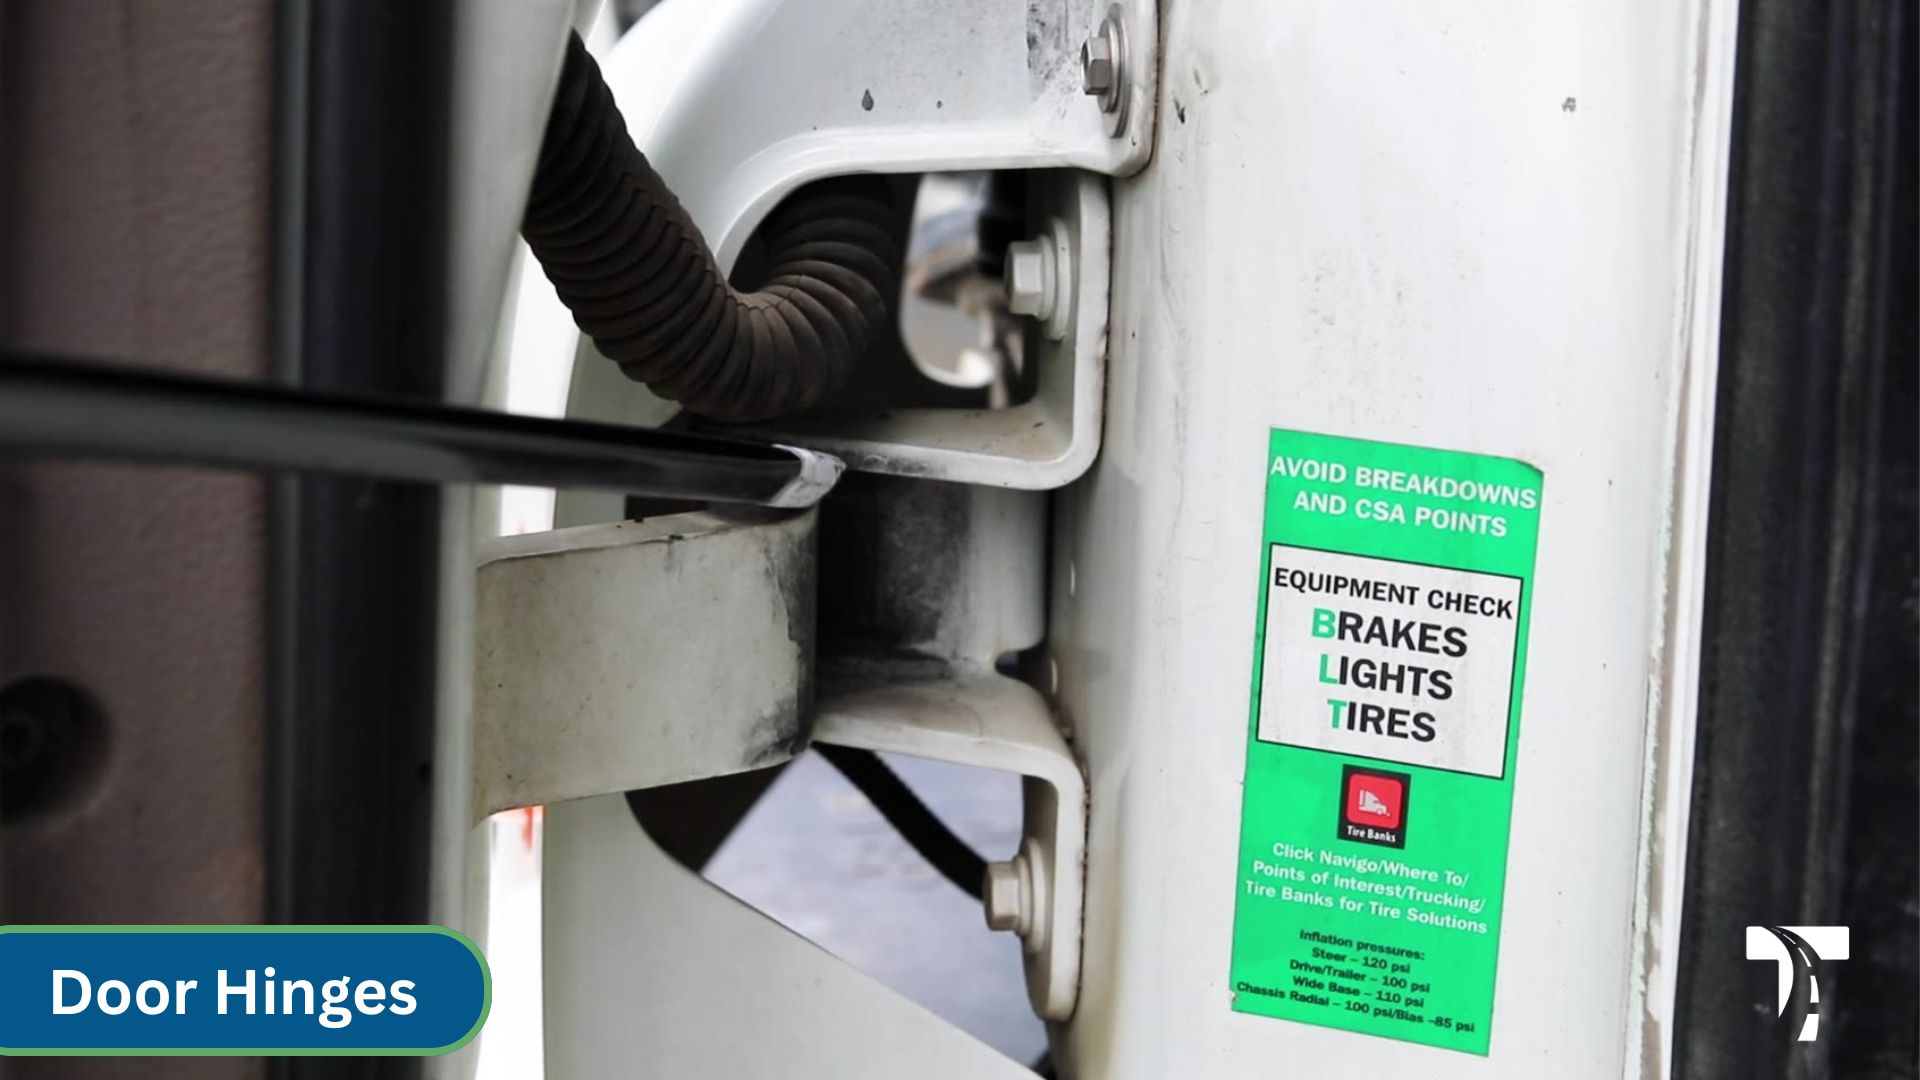
- Check the door. It should open and close properly. Inspect the hinges — they should not be cracked or broken and should be tight. Confirm there is a good rubber seal on the door and on the inside of the door frame.
- Check the steps. They should be properly secured, clear of objects, and strong enough to support the driver’s weight.
- Check the fuel tank. Inspect the saddle straps — they should be tight and have a rubber insulator. Check the fuel cap to make sure it is tight, has a good rubber seal, and has a DOT chain. Also, check underneath the truck for any leaks.
- Check the emergency equipment in the sidebox. It should contain three reflective triangles.
Airlines & Electrical Lines
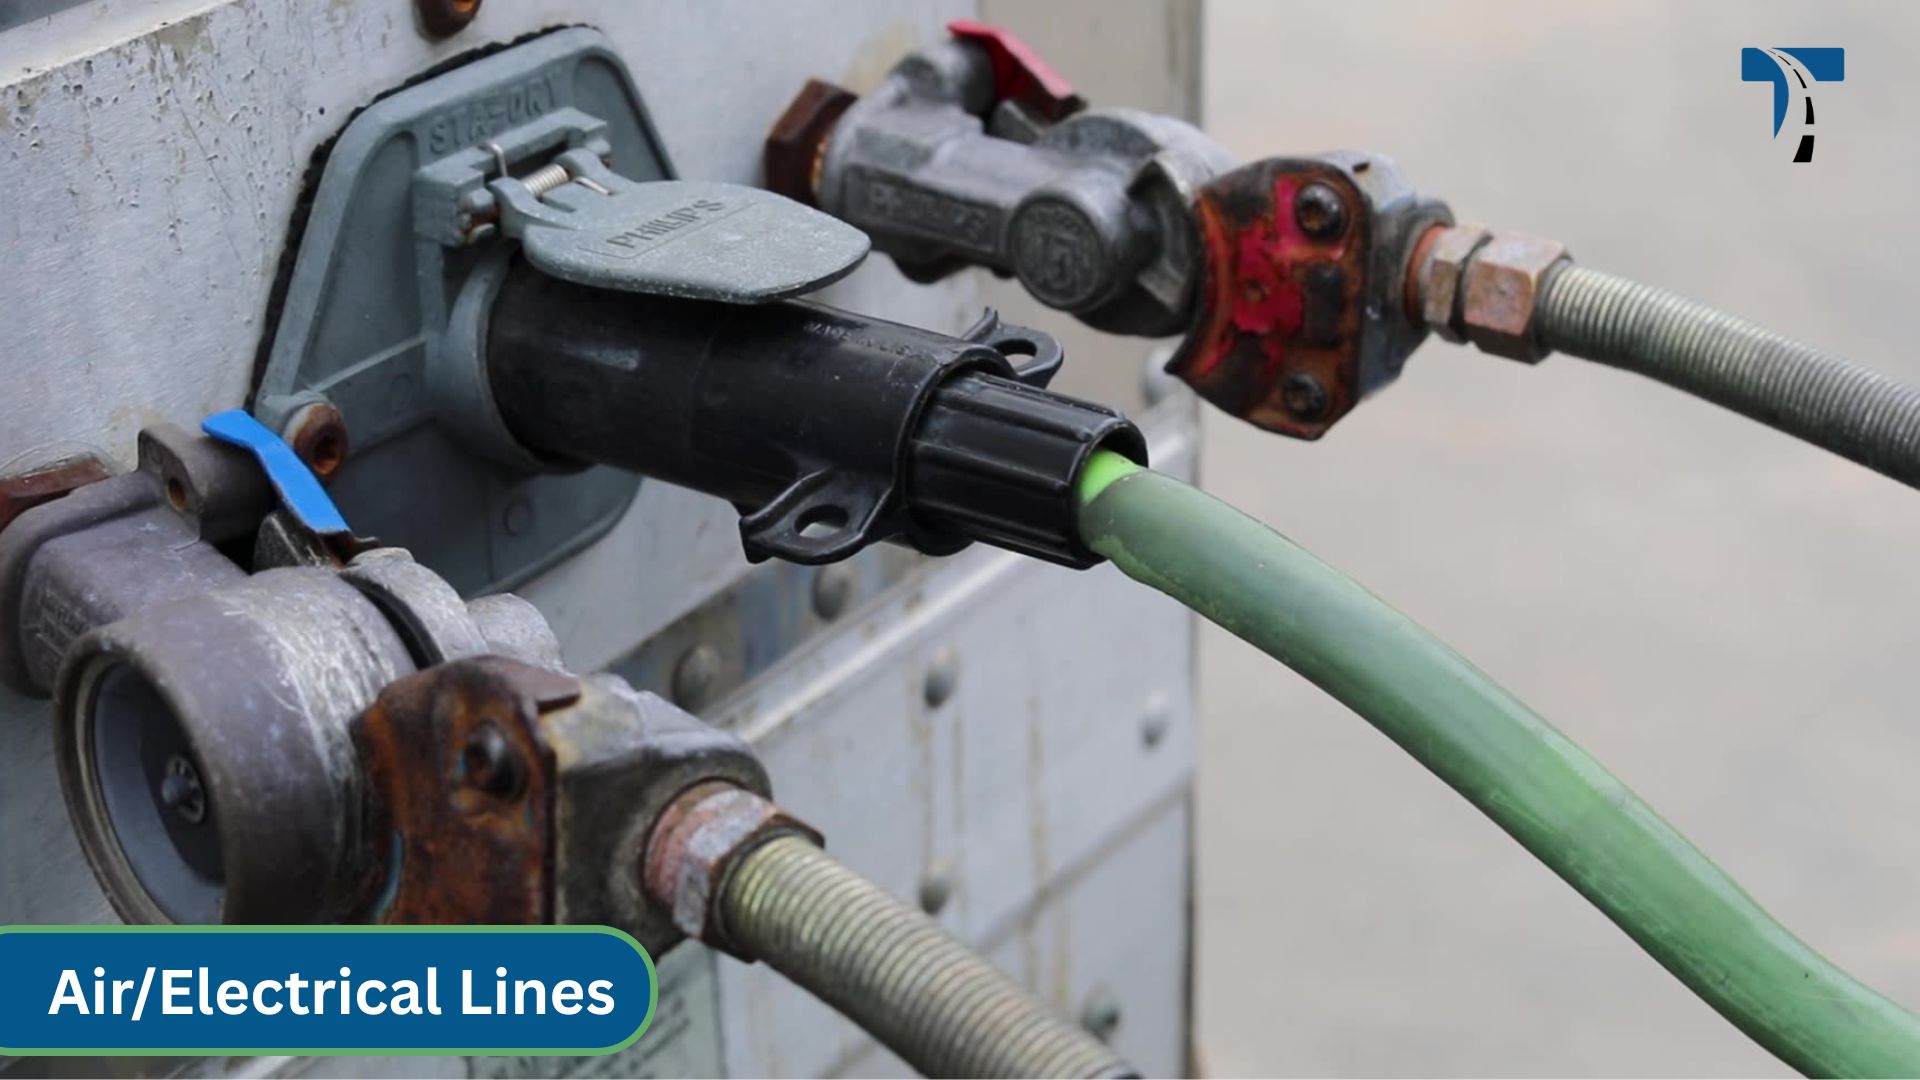
These six points of contact connect the tractor to the trailer.
- Inspect the airlines. There should be no leaks, cuts, splices, or worn areas.
- Inspect the electrical lines. They should not be broken, frayed, tangled, or hanging dangerously low.
- Check the glad hands. They should be in a locked position and undamaged and not leaking.
- Confirm the trailer electrical connector is firmly attached and latched in place.
Catwalk, Drive Shaft & Frame
- Check the catwalk and steps. They should be securely mounted, free of objects, and clear of obstructions.
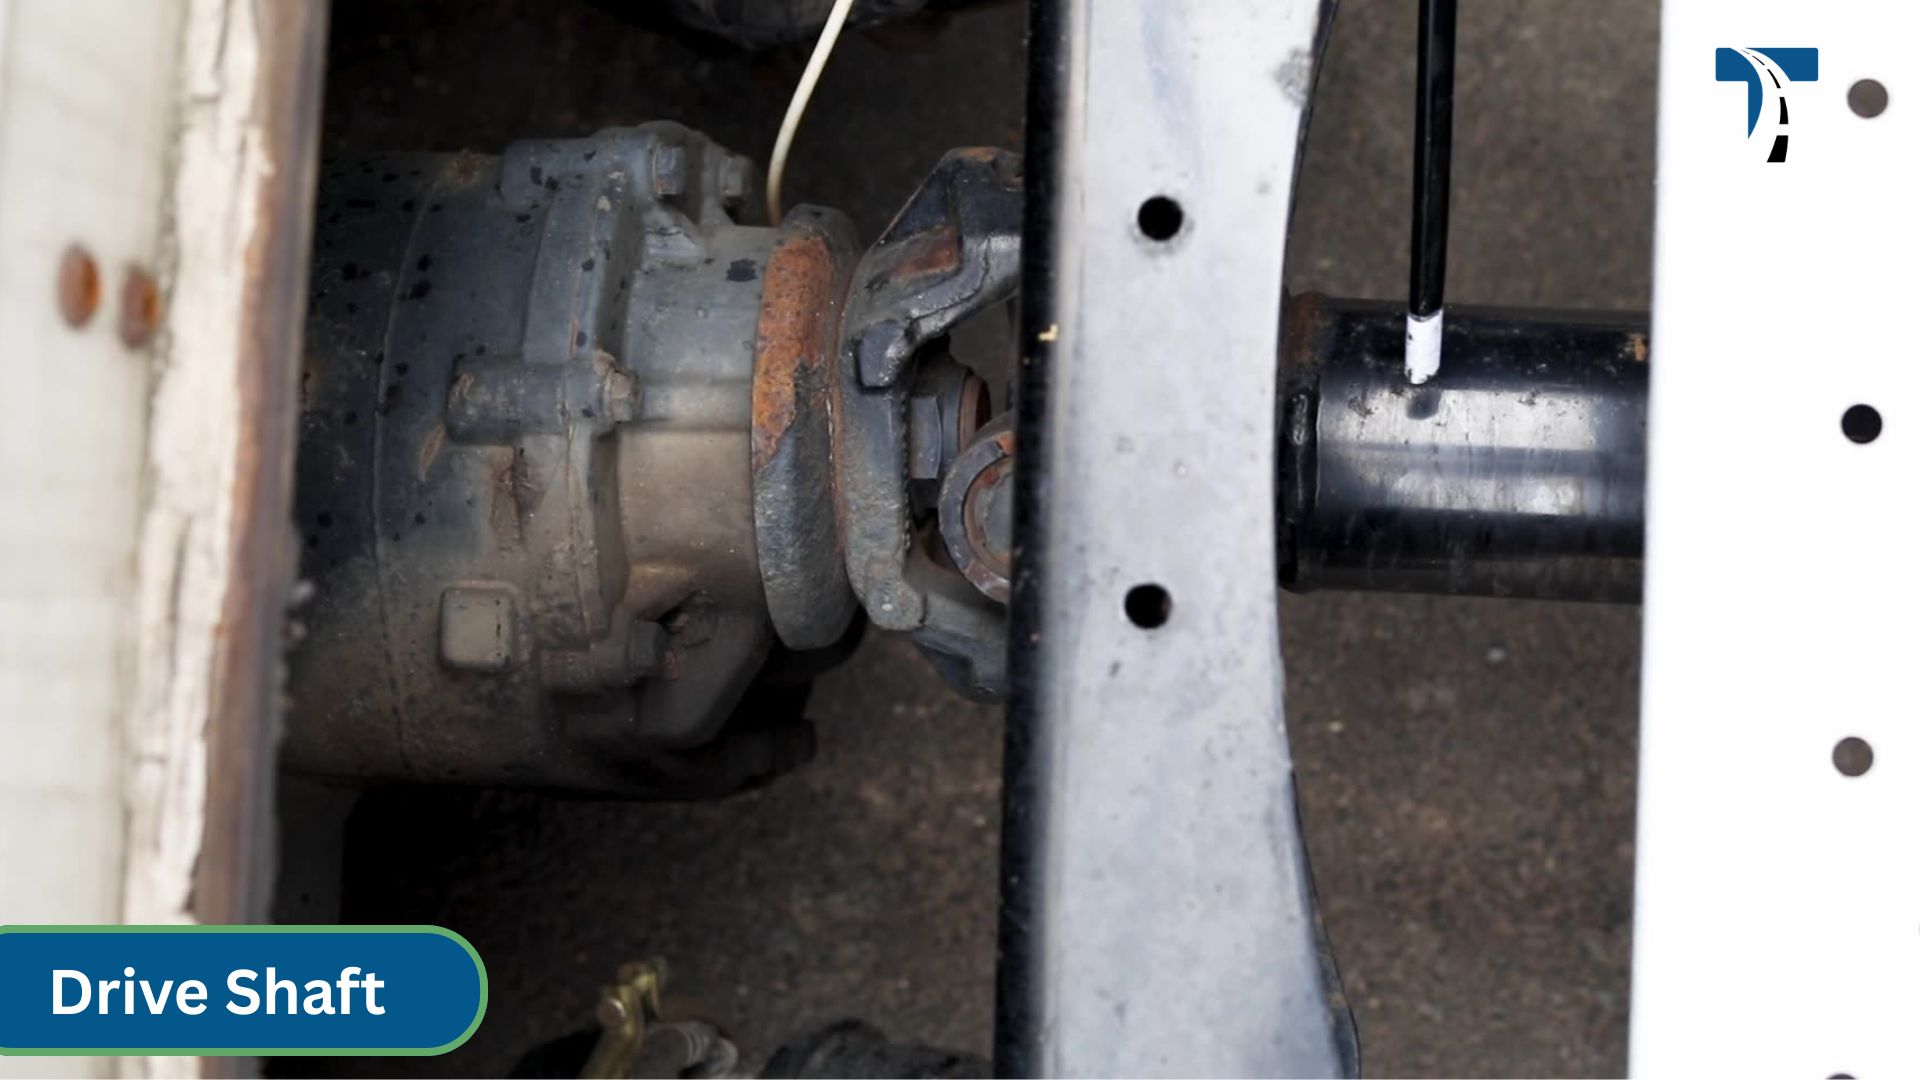
- Check the drive shaft. It should not be bent or cracked and should be free of foreign objects.
- Check the frame and cross members. There should be no illegal welds, holes, or damage of any kind.
Front Drive Axle
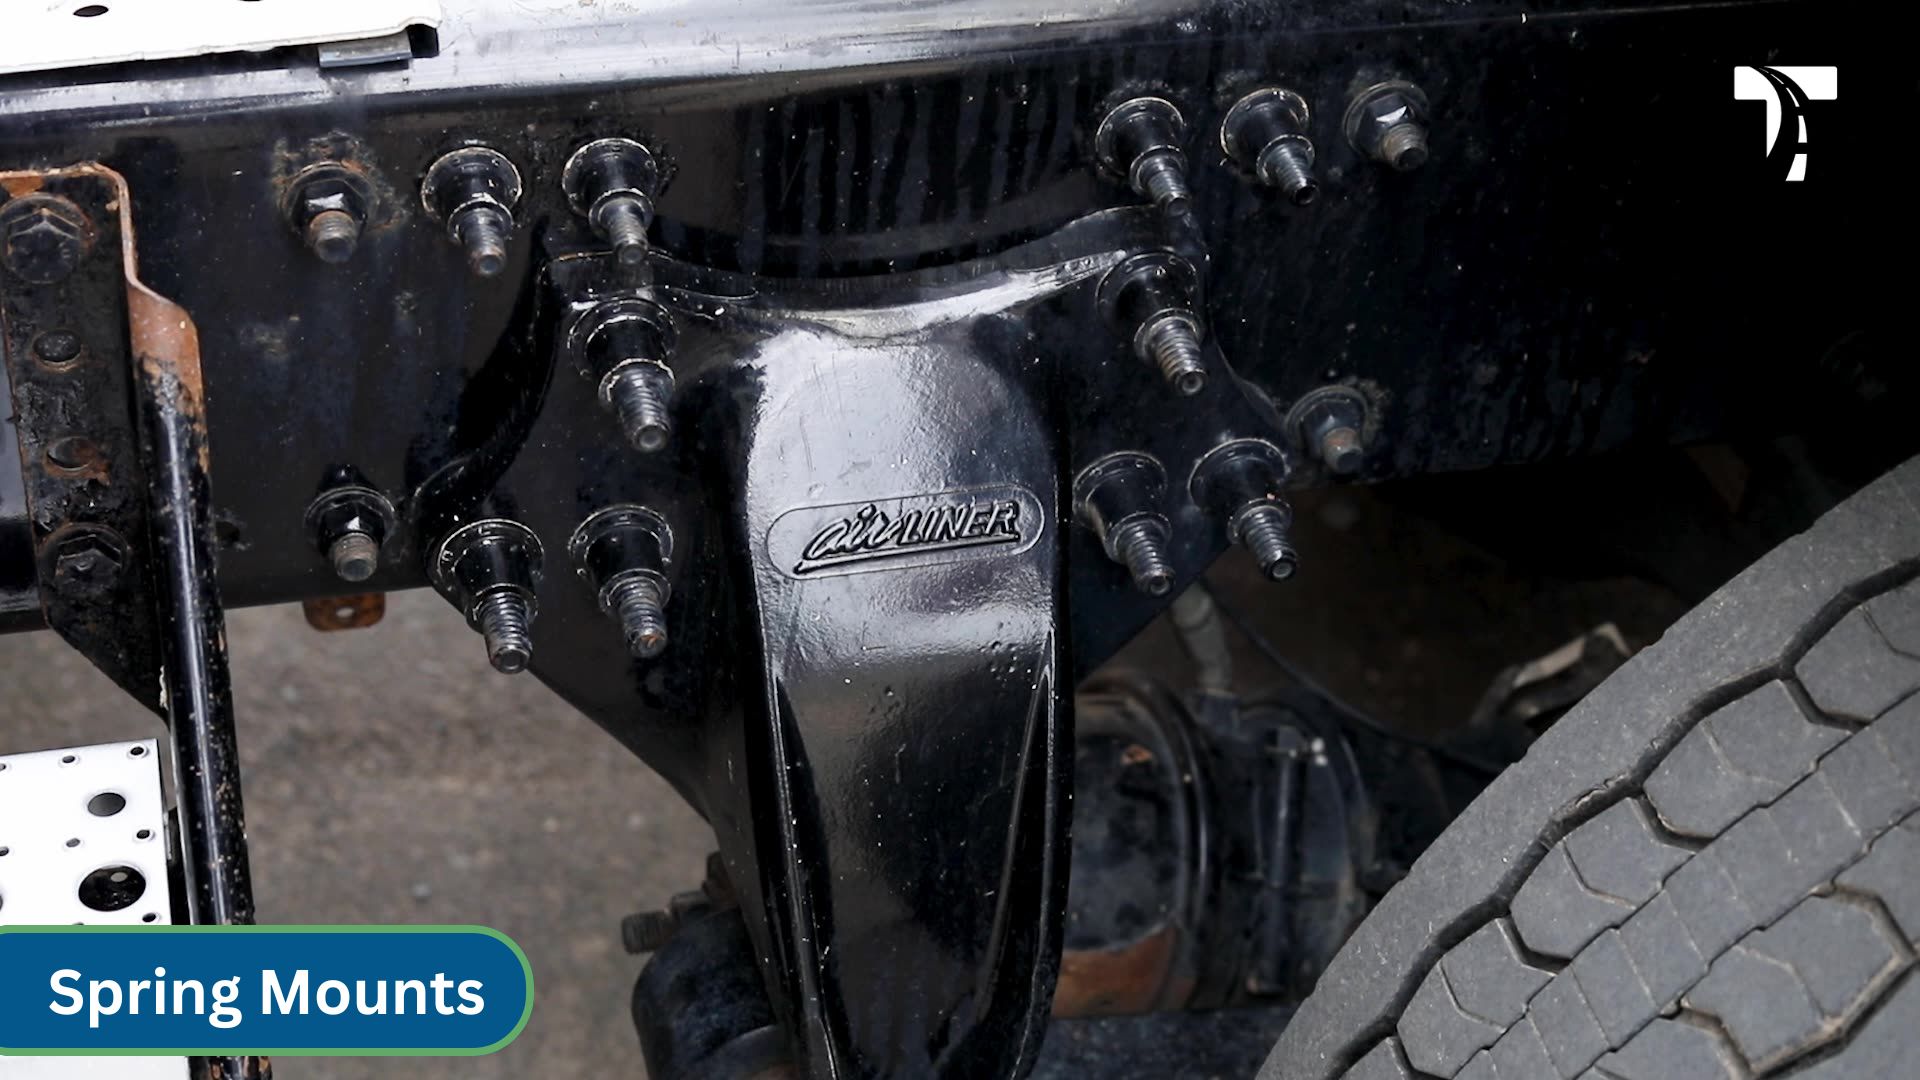
- Check the spring mounts. They should be securely mounted to the frame, not cracked or broken, with no loose or missing bolts.
- Check the springs and torque arm. They should not be shifted or cracked, should not be broken, and should be held tight with two U-bolts.
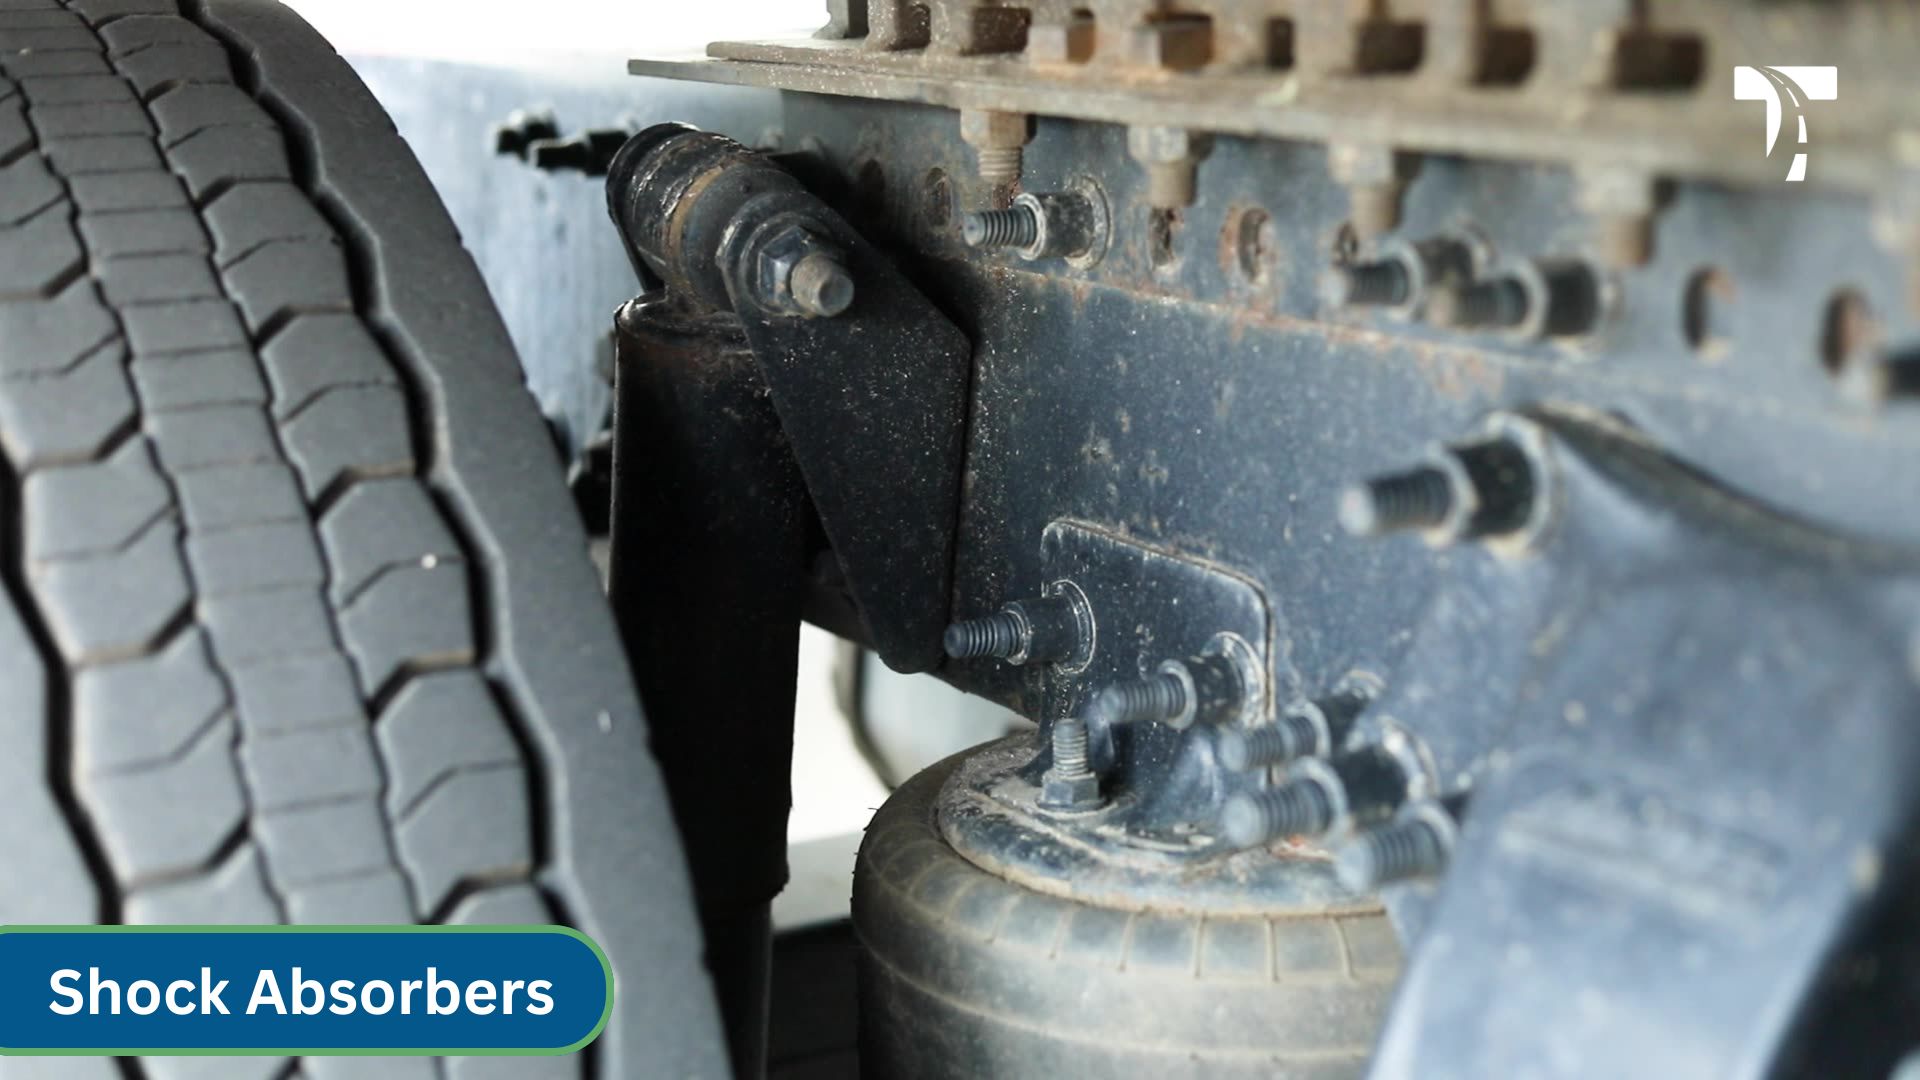
- Check the shock absorbers. They should be securely mounted with no leaks, dents, or loose or missing bolts.
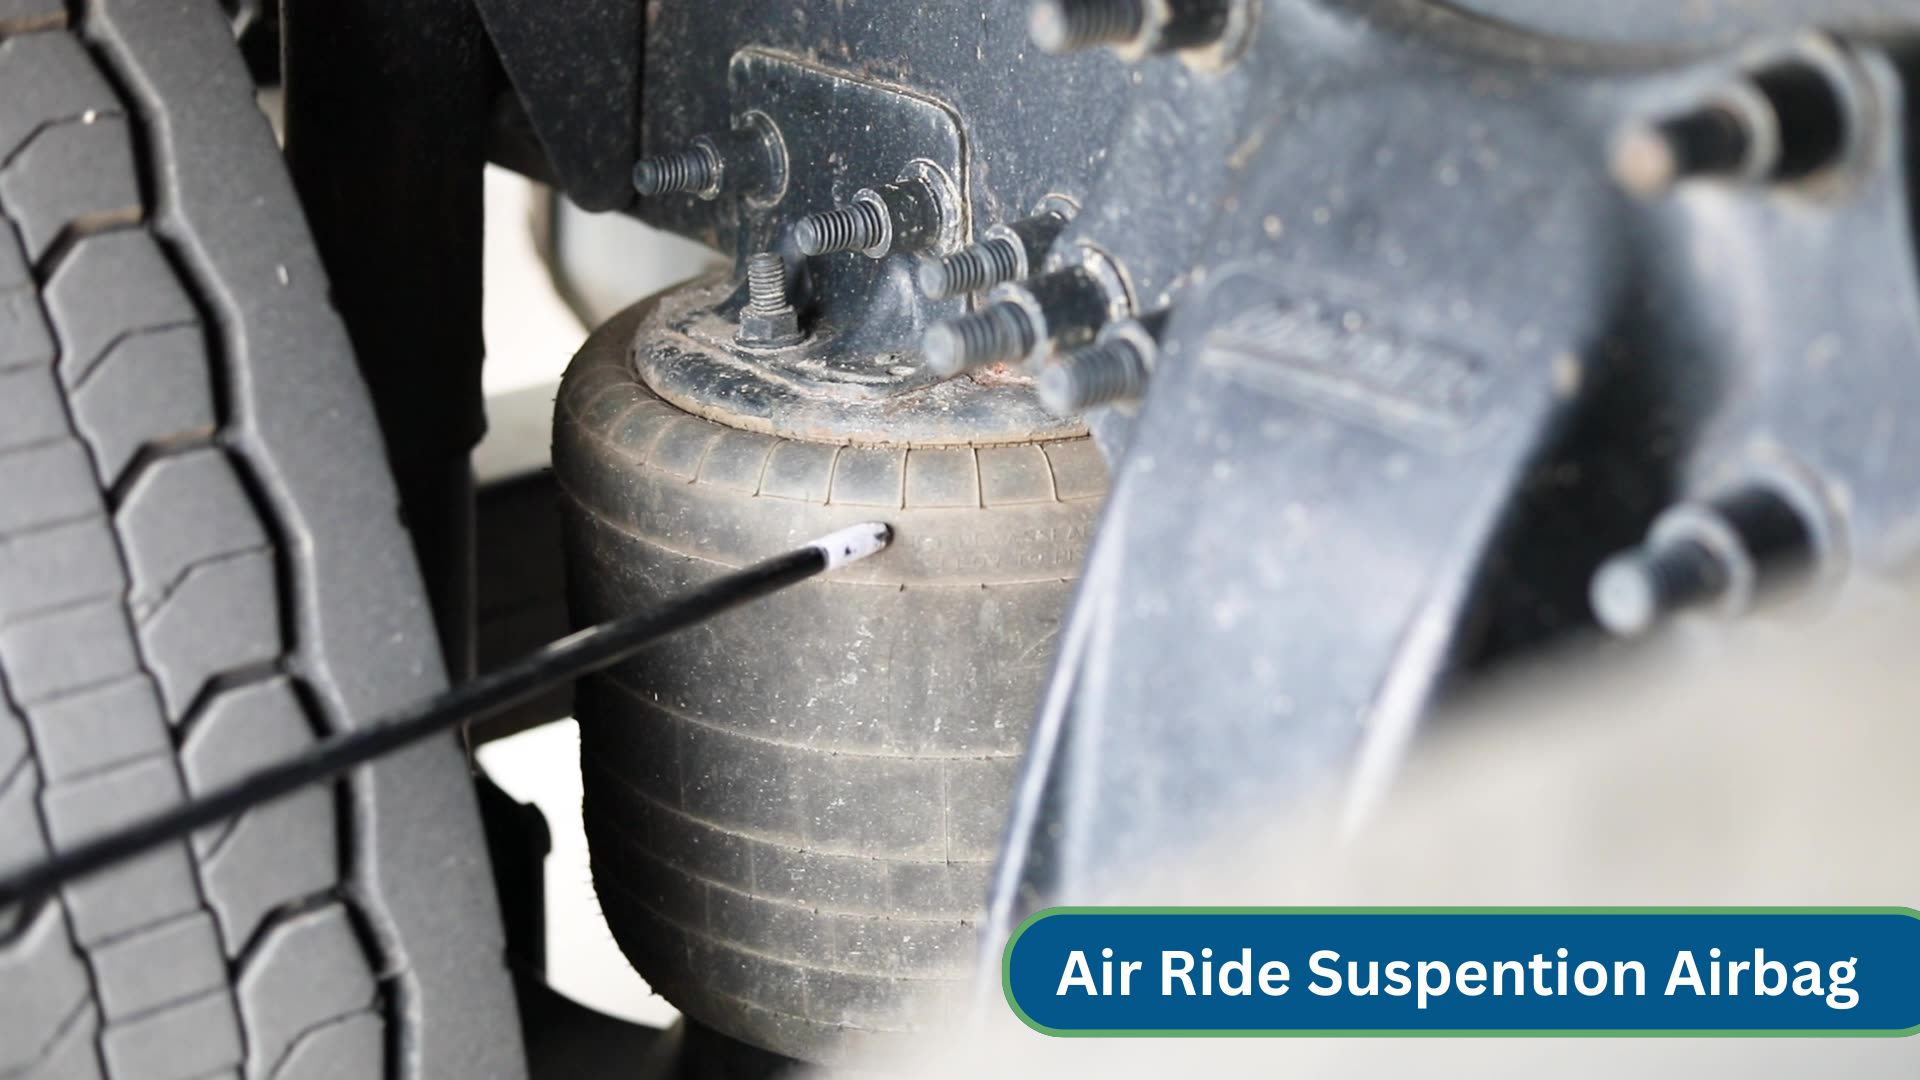
- Check the air ride suspension airbag. It should not be dry rotted, damaged, or leaking. Also check the airbag mounts.
Rear Drive Axle Braking System
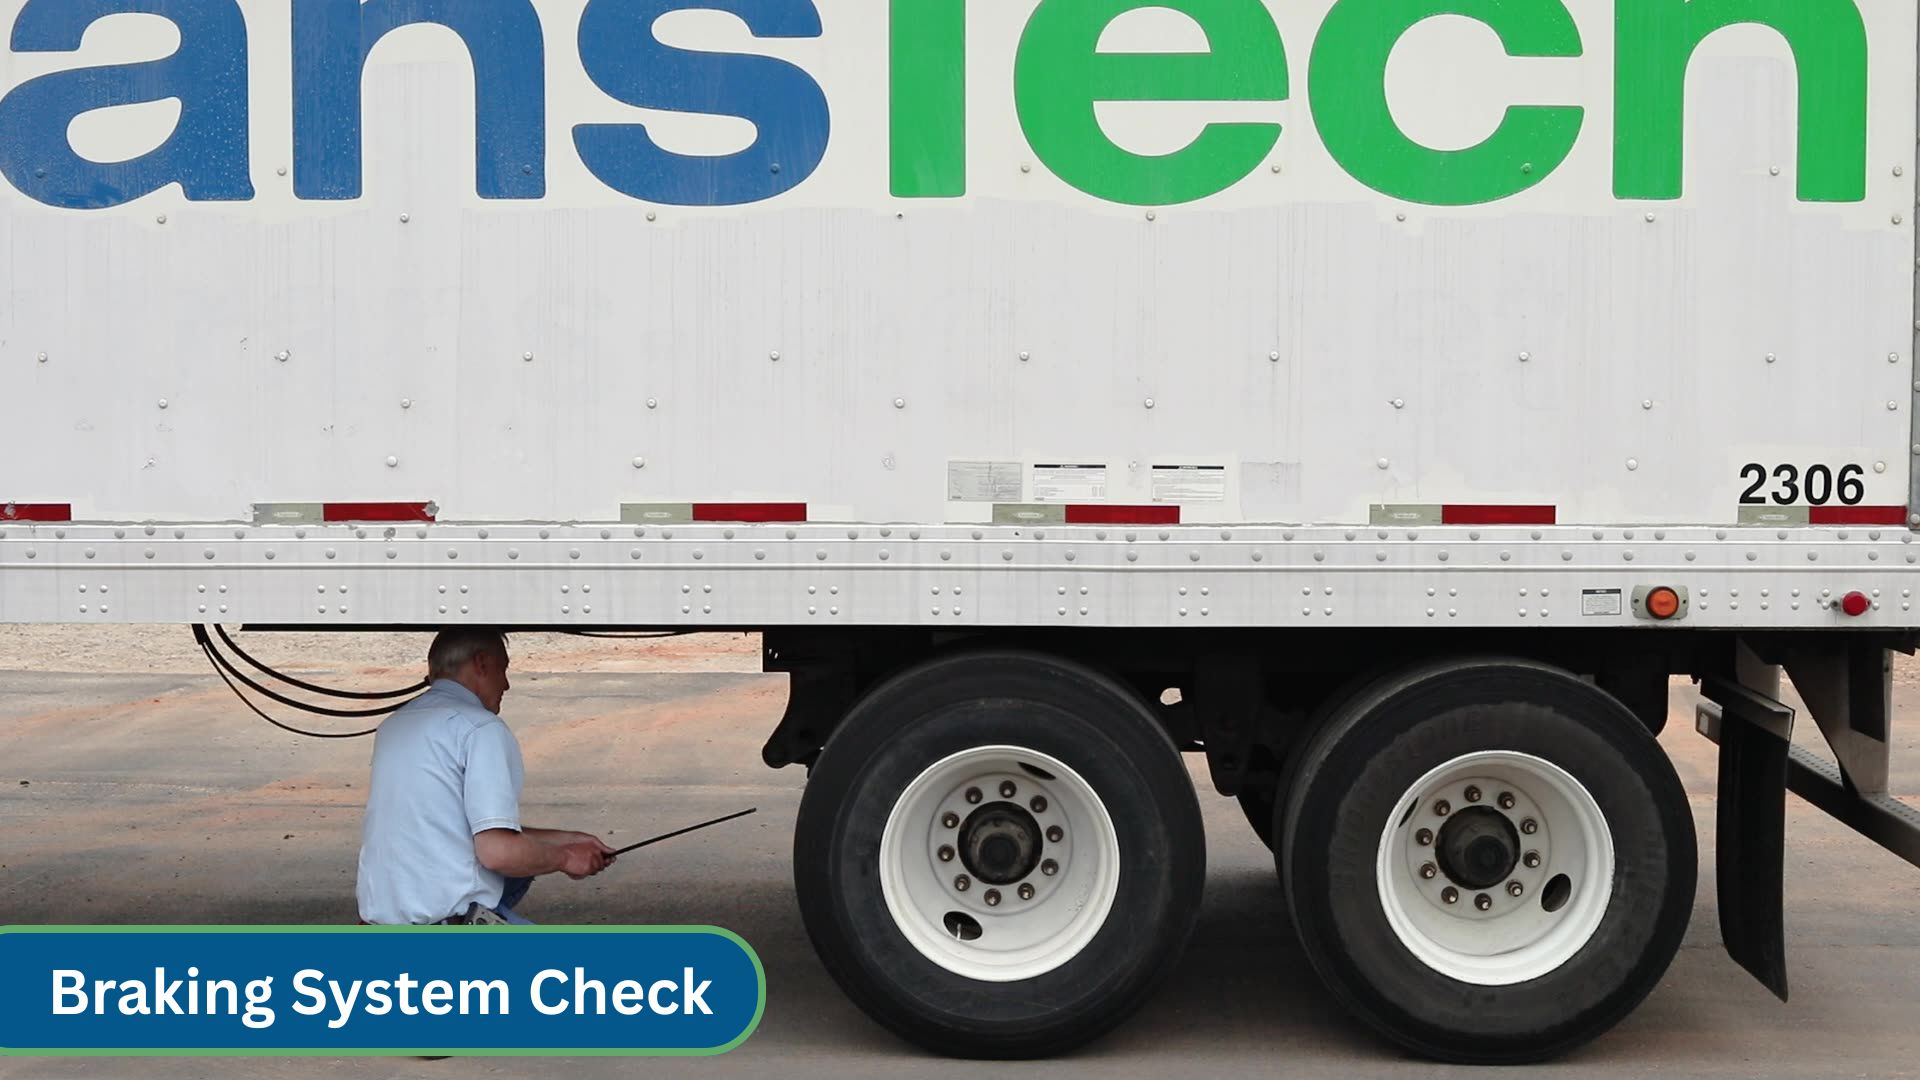
- Check the brake hoses for cracks, wear, or leaks, and look for signs of dry rot.
- Check the brake chamber. It should be securely mounted, not cracked, broken, leaking, or dented.
- Check the slack adjuster and push rod. They should not be bent or broken, and should have no loose or missing parts. The adjuster should not pull more than 1 inch. Anything over 2 inches is out of service.
- Check the brake shoes for oil or grease and confirm at least 1/4 inch of pad. Check the brake drum for cracks, breaks, or warping.
- Check the mud flaps. They should be securely mounted with no loose or missing bolts.
Rear of the Tractor
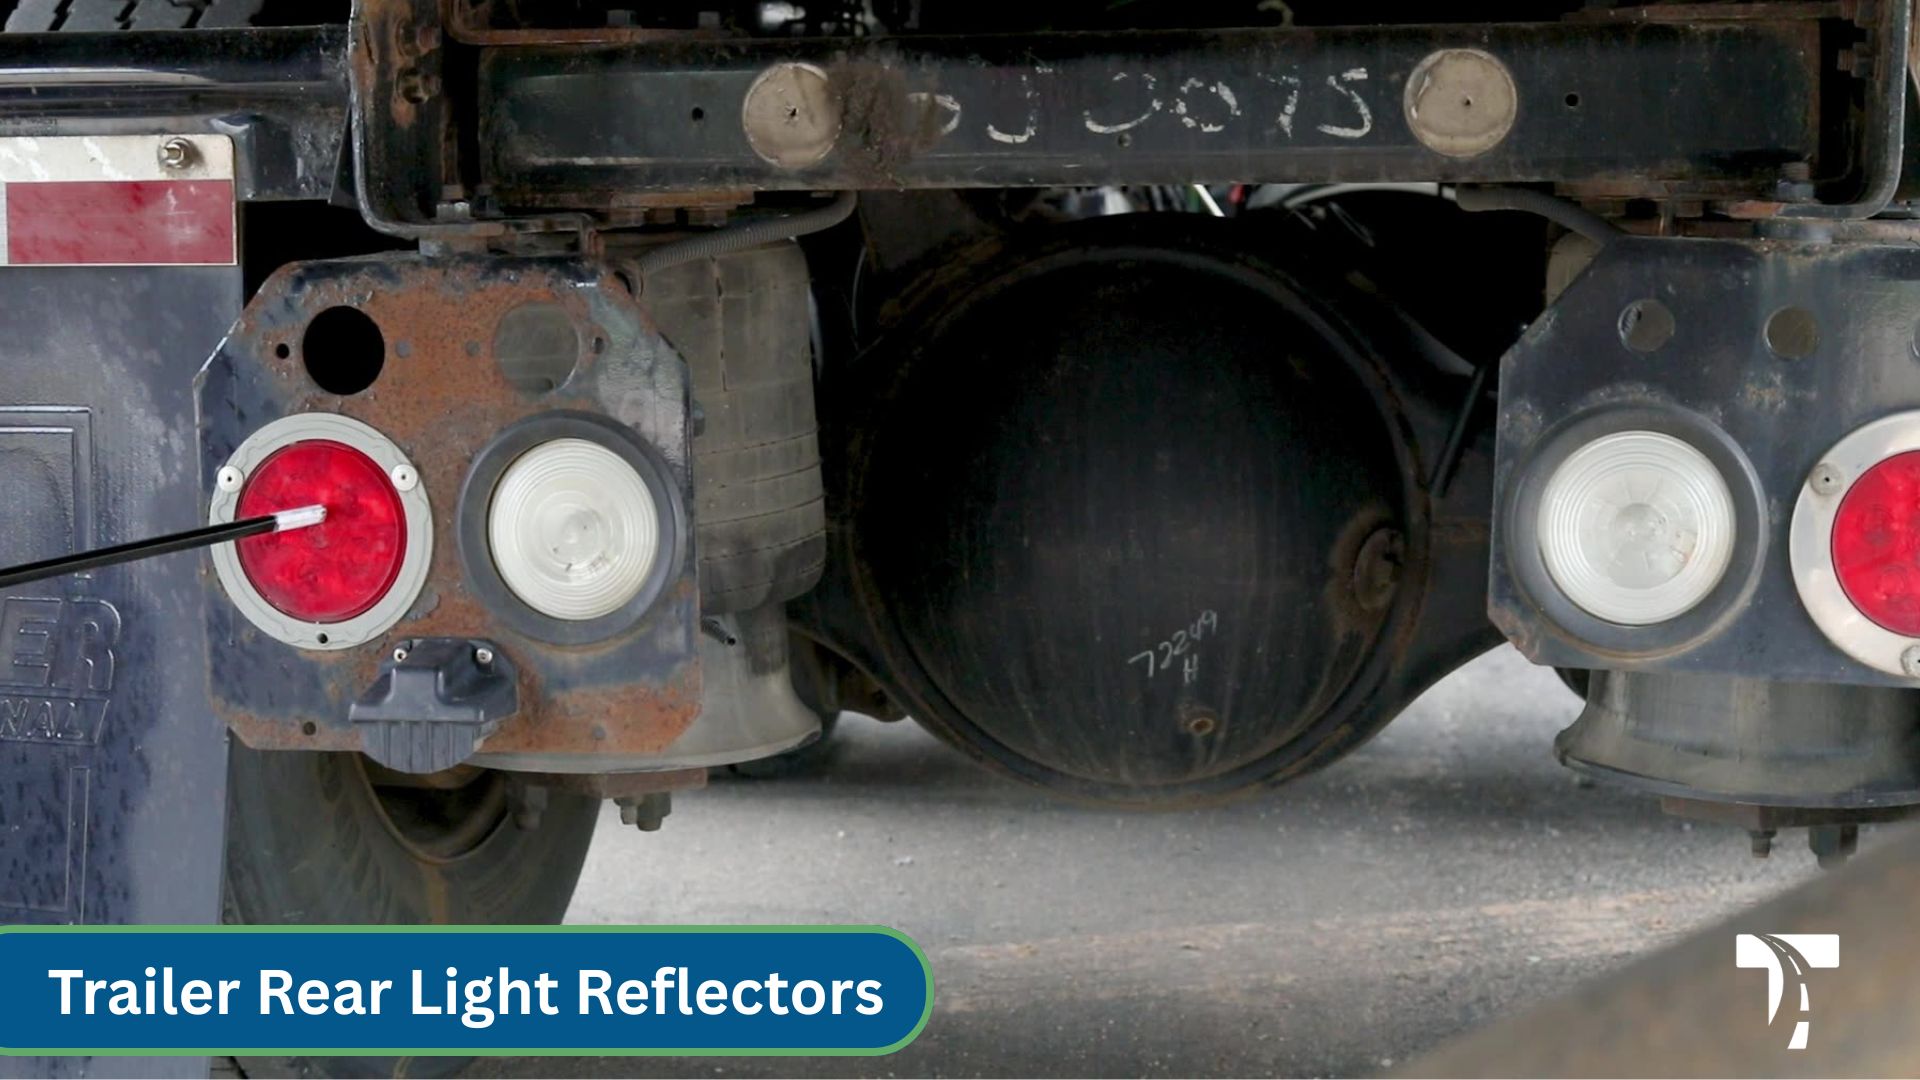
- Check the rear lights and reflectors. They should be red, securely mounted, and free of cracks or breaks. They should function as turn signals, four-ways, brake lights, and tail lights.
Fifth Wheel
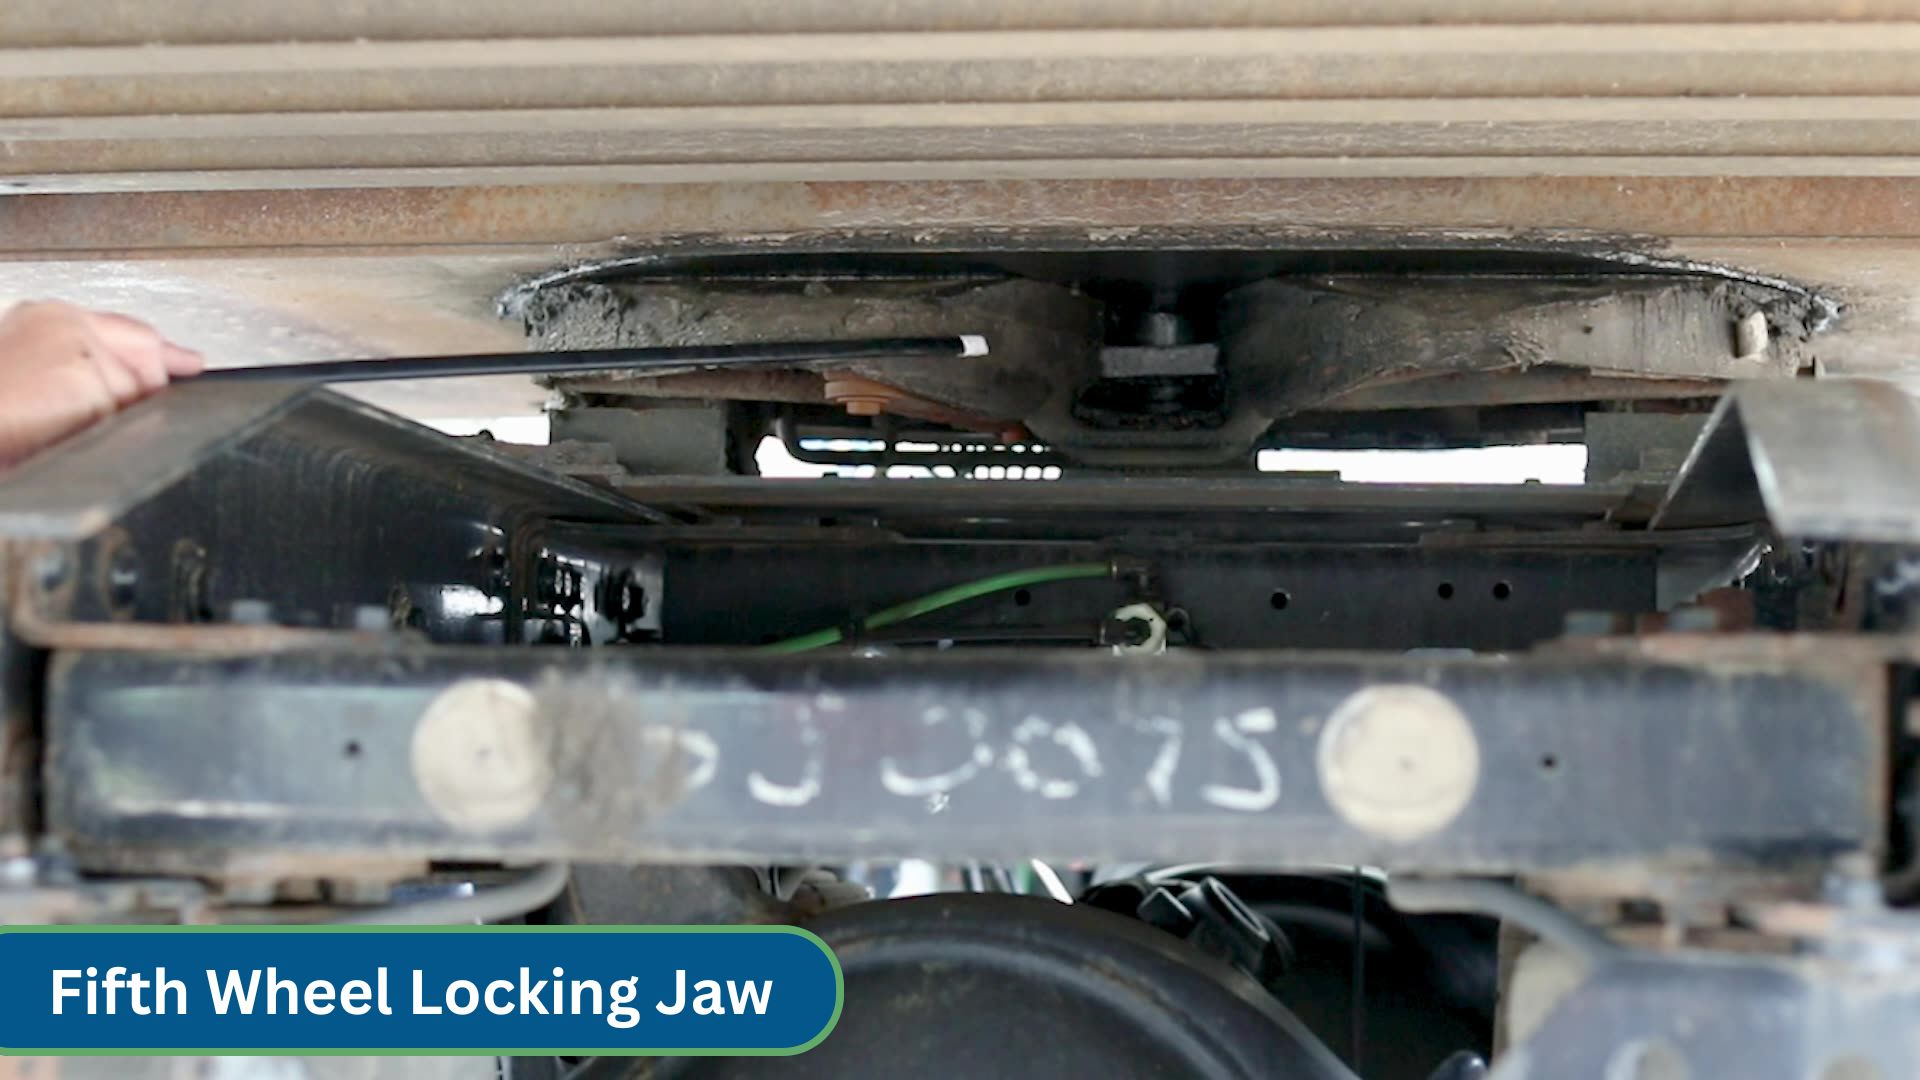
- Check the locking jaw. It should be fully around the shank of the kingpin and not cracked, damaged, or broken.
- Check the kingpin and apron. The kingpin should not be bent, cracked, or flat-spotted. The apron should have no cracks, damage, or breaks.
- Check the platform and mounting bolts. There should be no loose or missing bolts, and the fifth wheel should be securely mounted to the tractor frame.
- Check the fifth wheel skid plate to confirm it is properly greased.
- Check the locking pins on the sides. Pins should be fully engaged with no leaks on the airline fifth wheel.
- Check the release arm. It should be fully engaged, and the safety latch should be in place.
Front of the Trailer
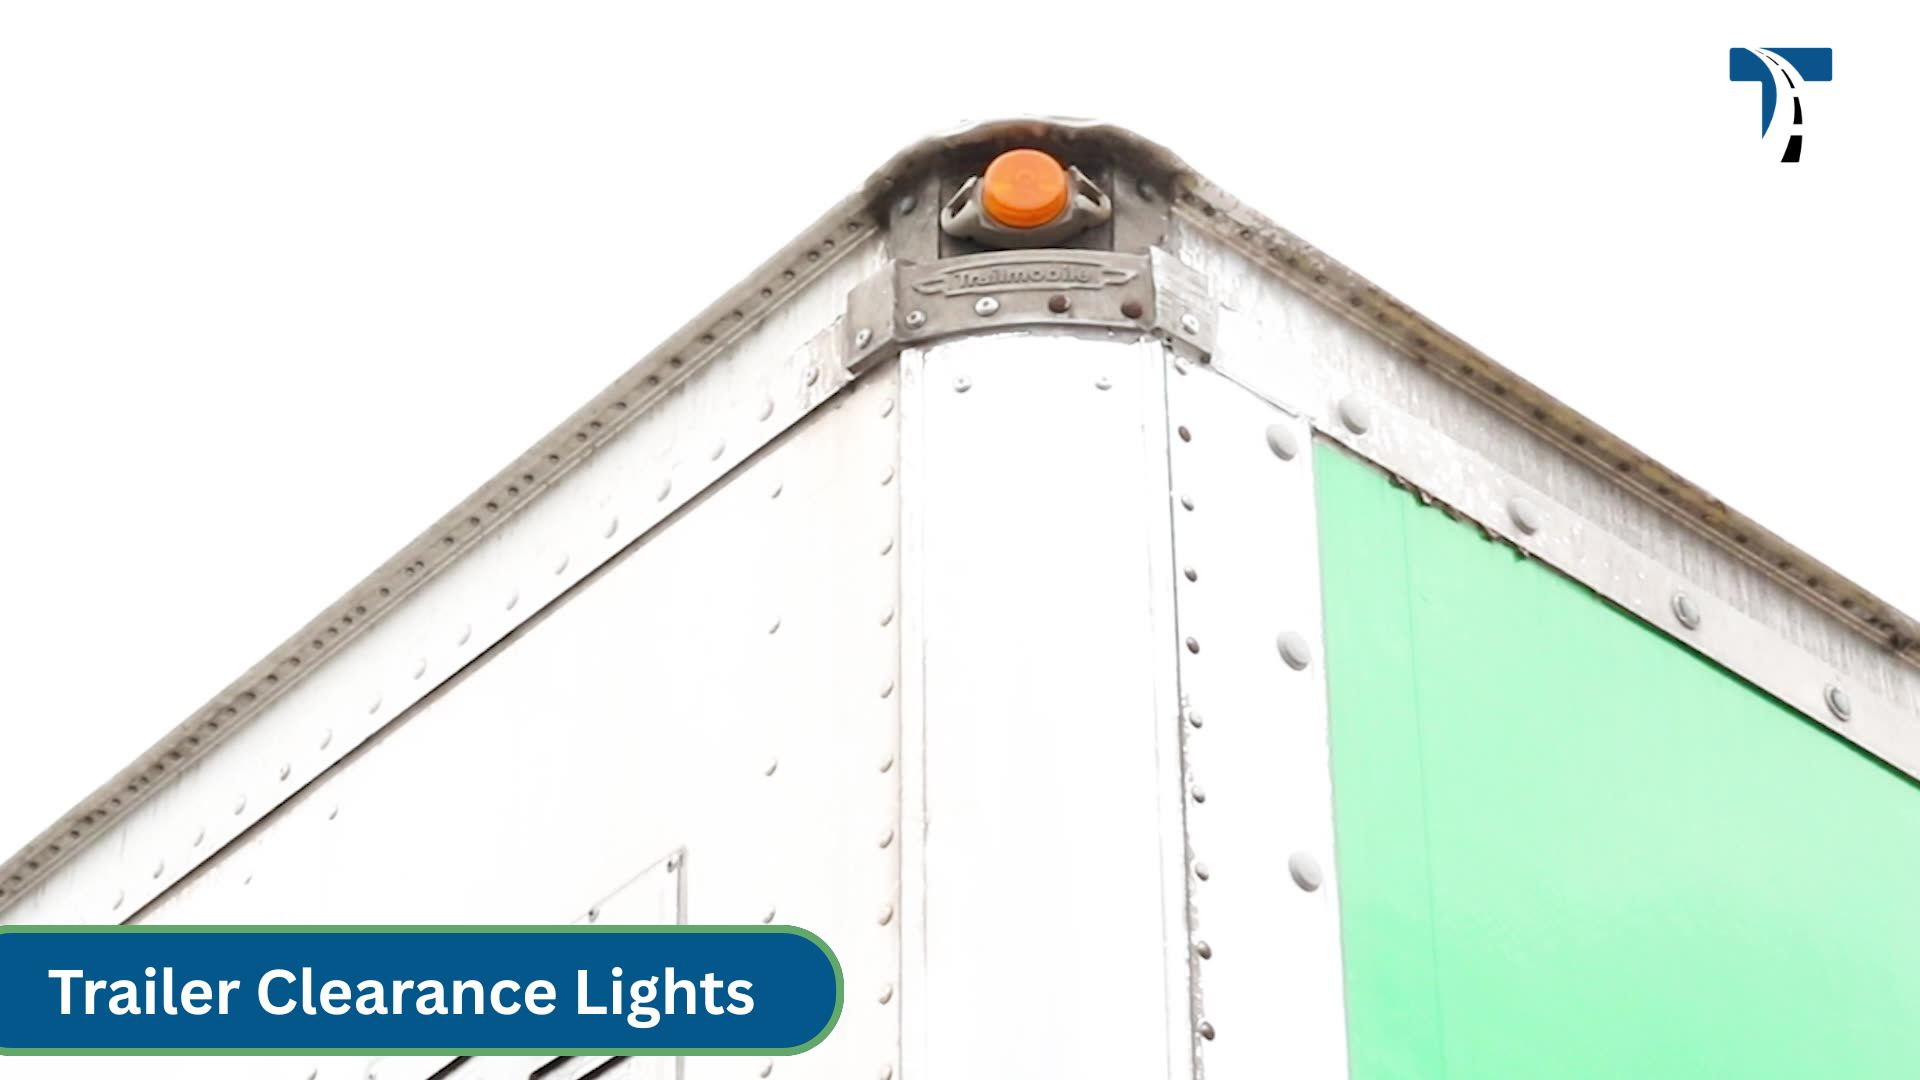
- Check the clearance lights. They should be amber in color and not cracked or broken.
- Check the header board. It should be securely mounted, free of damage, strong enough to support the cargo’s weight, and has no cracks, bulges, or holes.
- Check the trailer frame. It should not be bent, cracked, or broken, and there should be no illegal welds.
- Check the cross members. They should not be bent or broken and should have no loose or missing bolts.
- Check the trailer floor for holes or other damage along its entire length.
- Check that the DOT reflective tape is clear, visible, and present along the entire length of the trailer.
Landing Gear
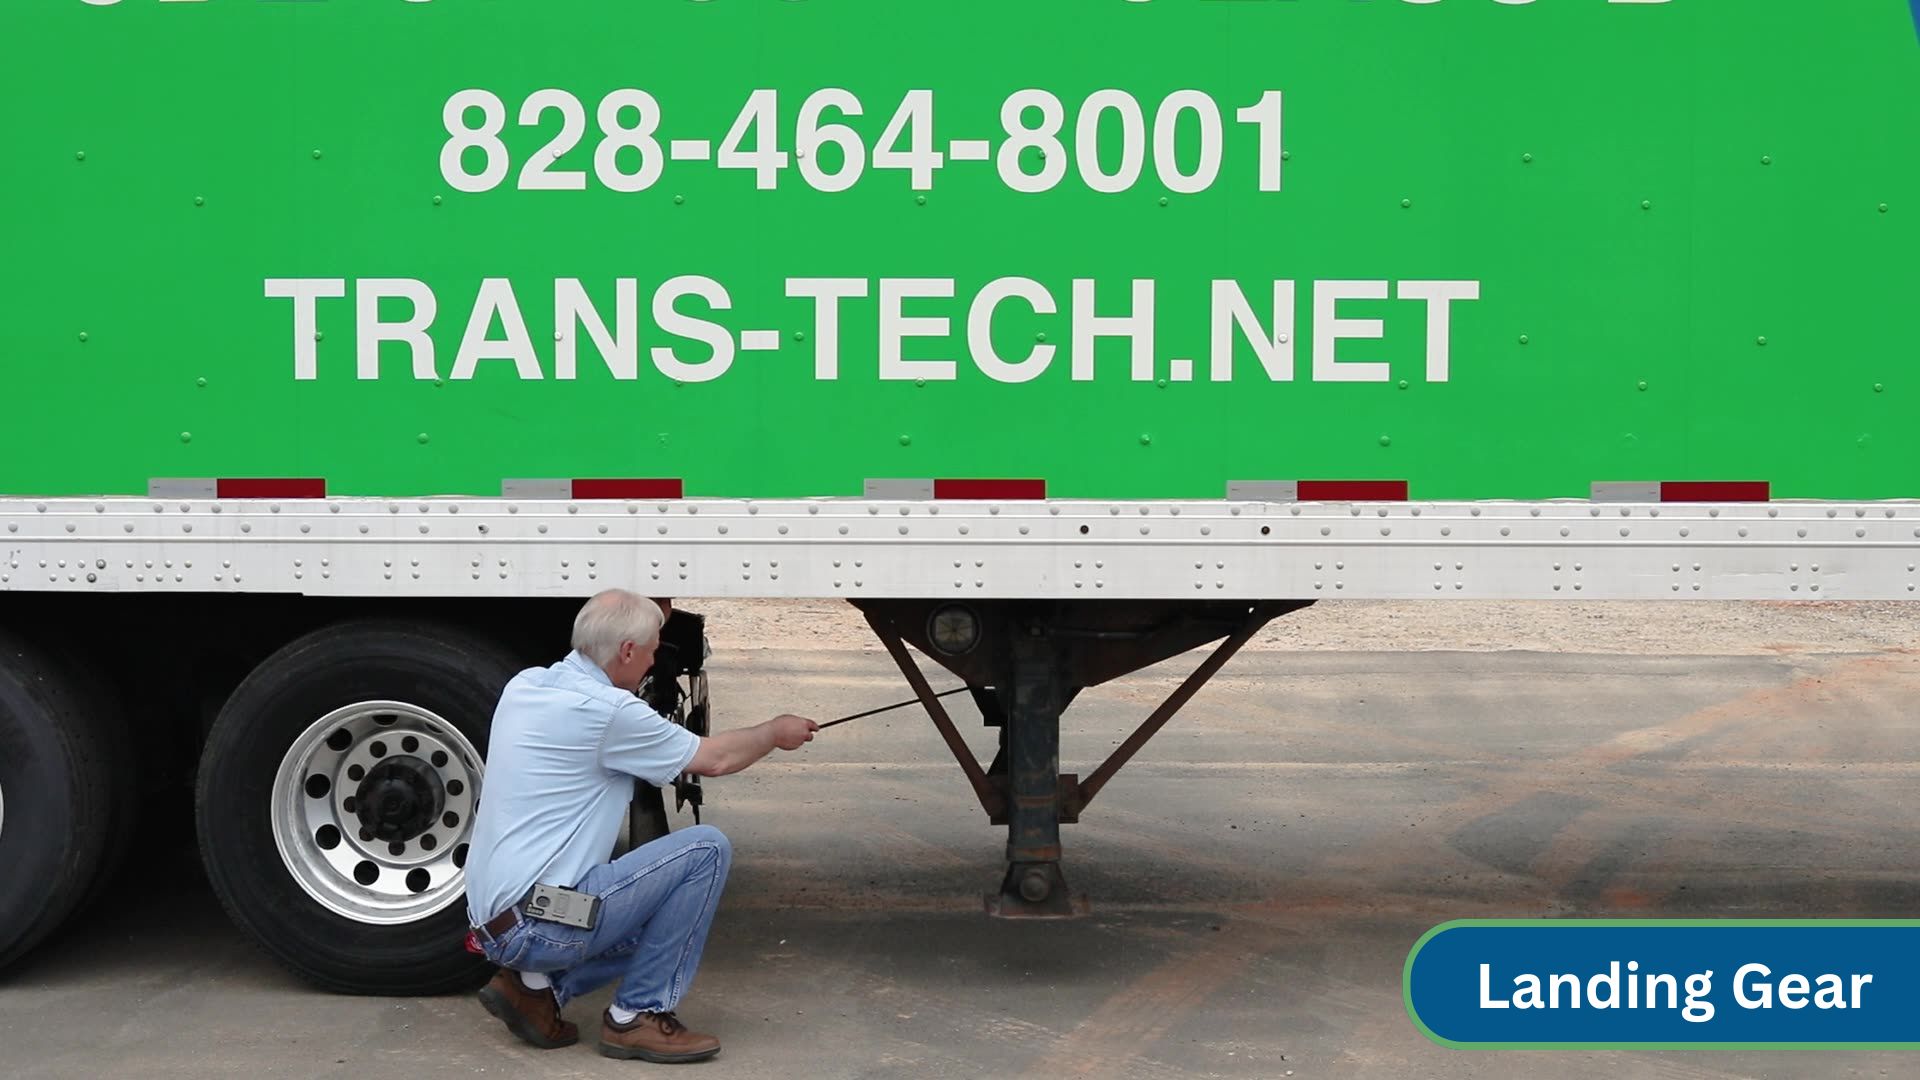
- Check that there is enough space between the back of the tractor frame and the landing gear to allow for proper turning.
- Check the landing gear itself. It should be fully raised, properly secured, not damaged or cracked, and have no illegal welds.
- Check that the crank handle is securely in its cradle.
Front Trailer Axle
- Check the multi-function light on the trailer side. It should be amber in color, serve as the left turn signal, four-way flasher, and marker light, and should not be cracked, broken, or damaged.
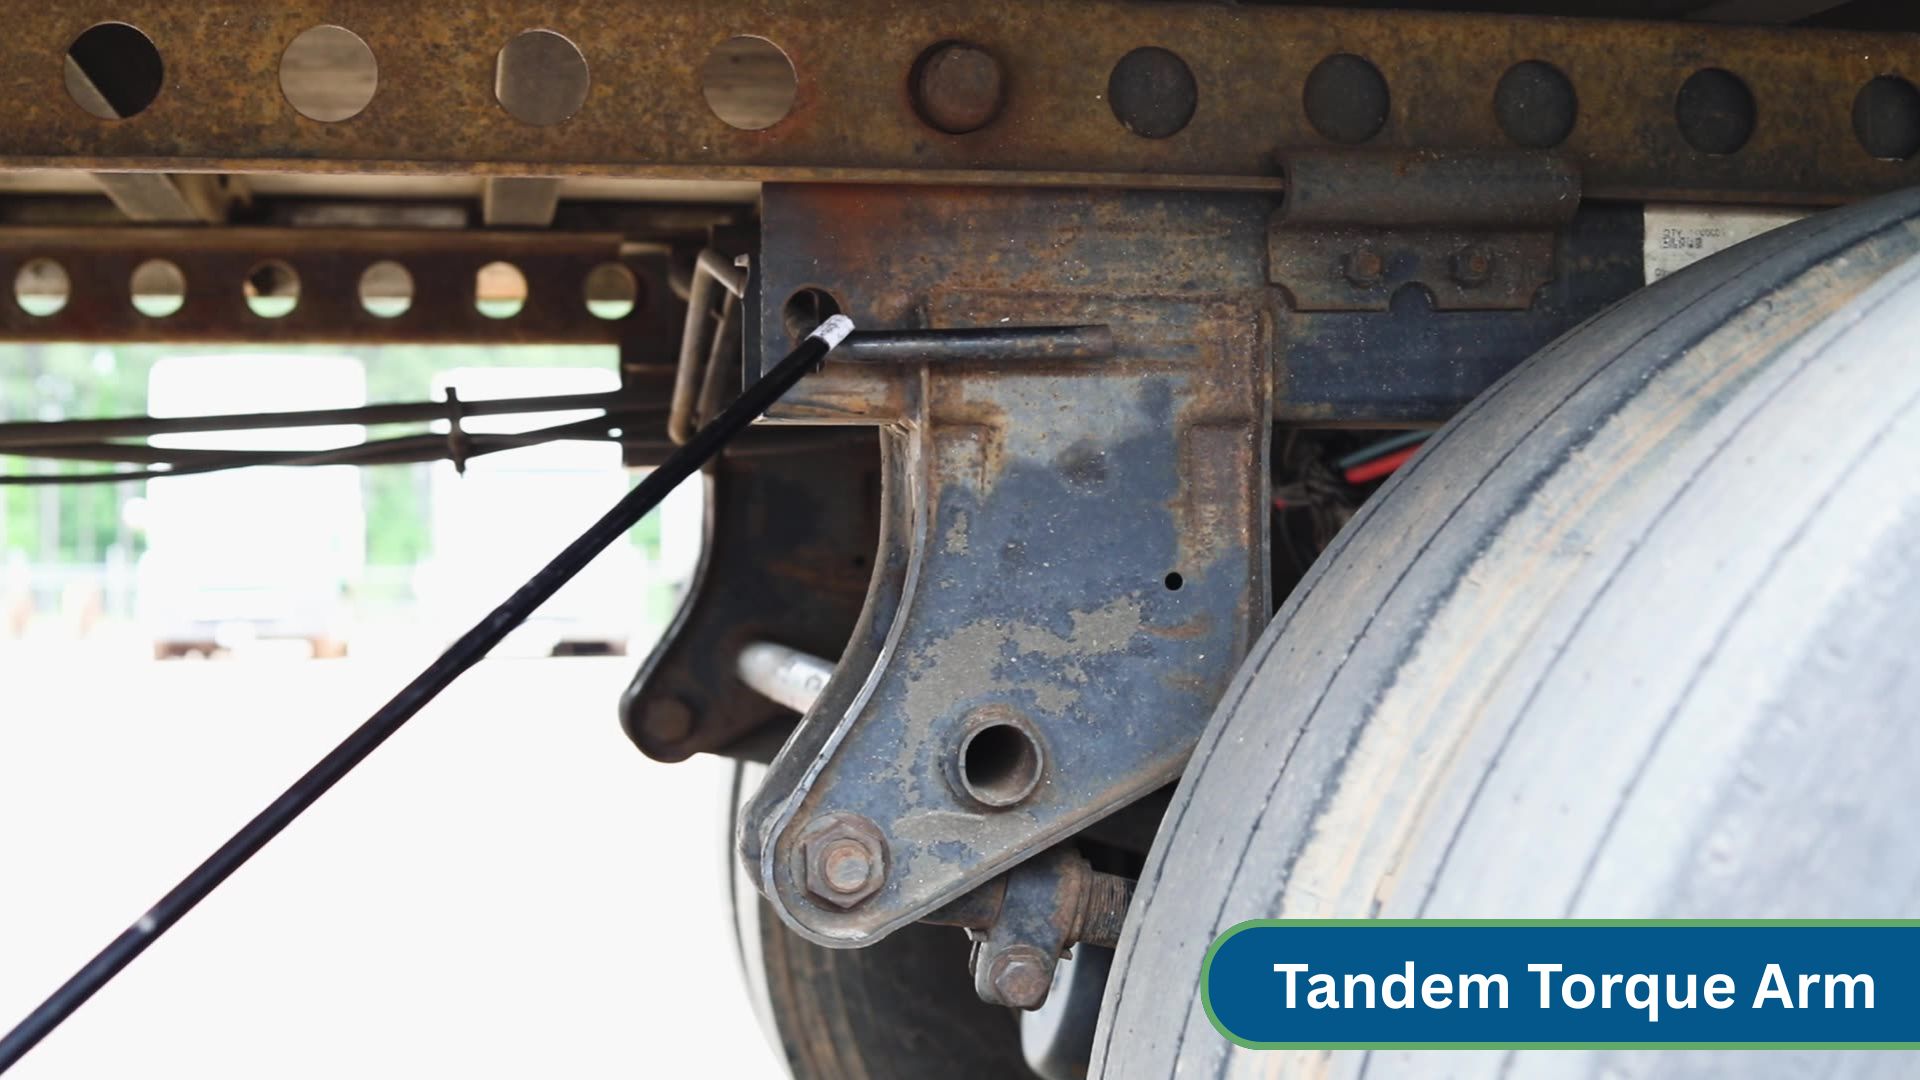
- Check the tandem release arms and locking pins. Pins should be in place and the release arm should be fully engaged.
- Check the spring mounts. They should be securely mounted to the frame, not cracked or broken, with no loose or missing bolts.
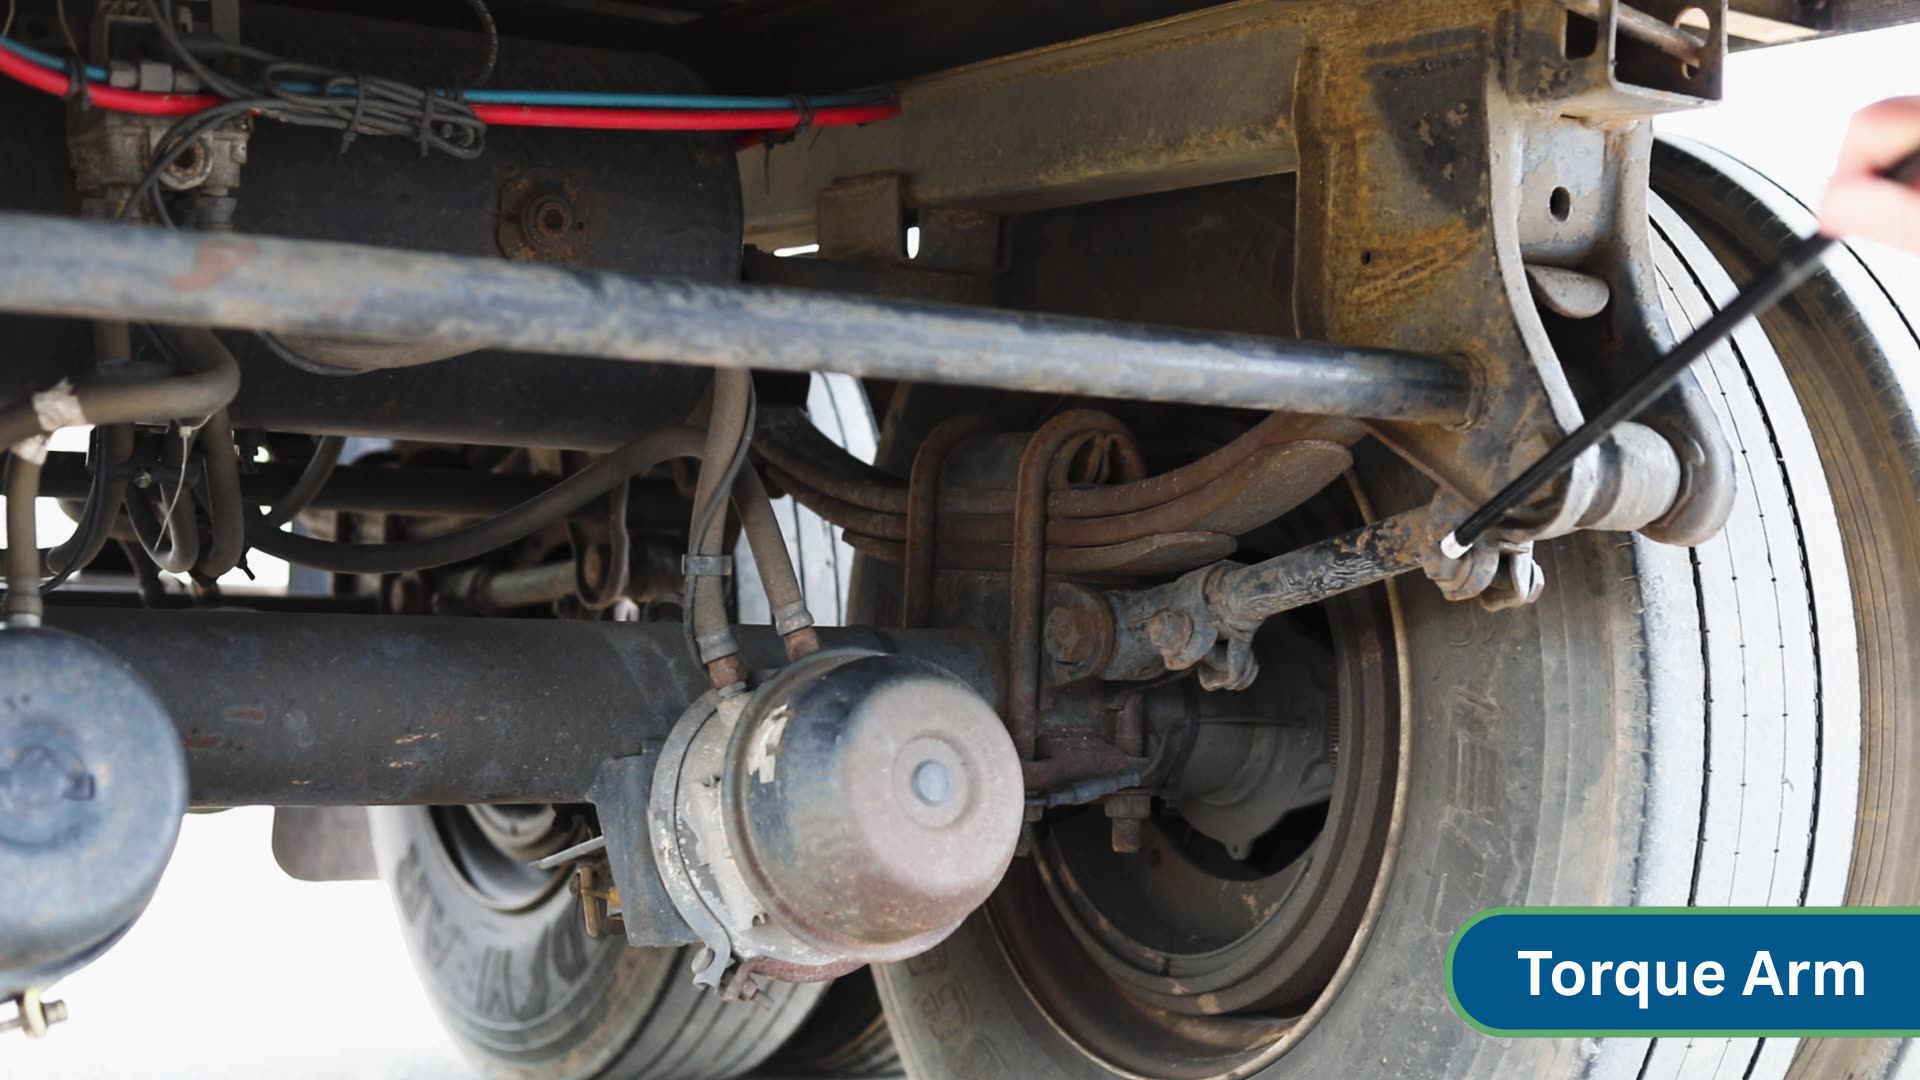
- Check the torque arm. It should be securely mounted, not loose or cracked, with no missing bolts.
- Check the springs. They should not be shifted, scissoring, cracked, or broken, and should be held together by two tight U-bolts.
Front Trailer Axle Braking System
- Check the brake hoses for cracks, wear, leaks, or signs of dry rot.
- Check the brake chamber. It should be securely mounted, not cracked, broken, leaking, or dented.
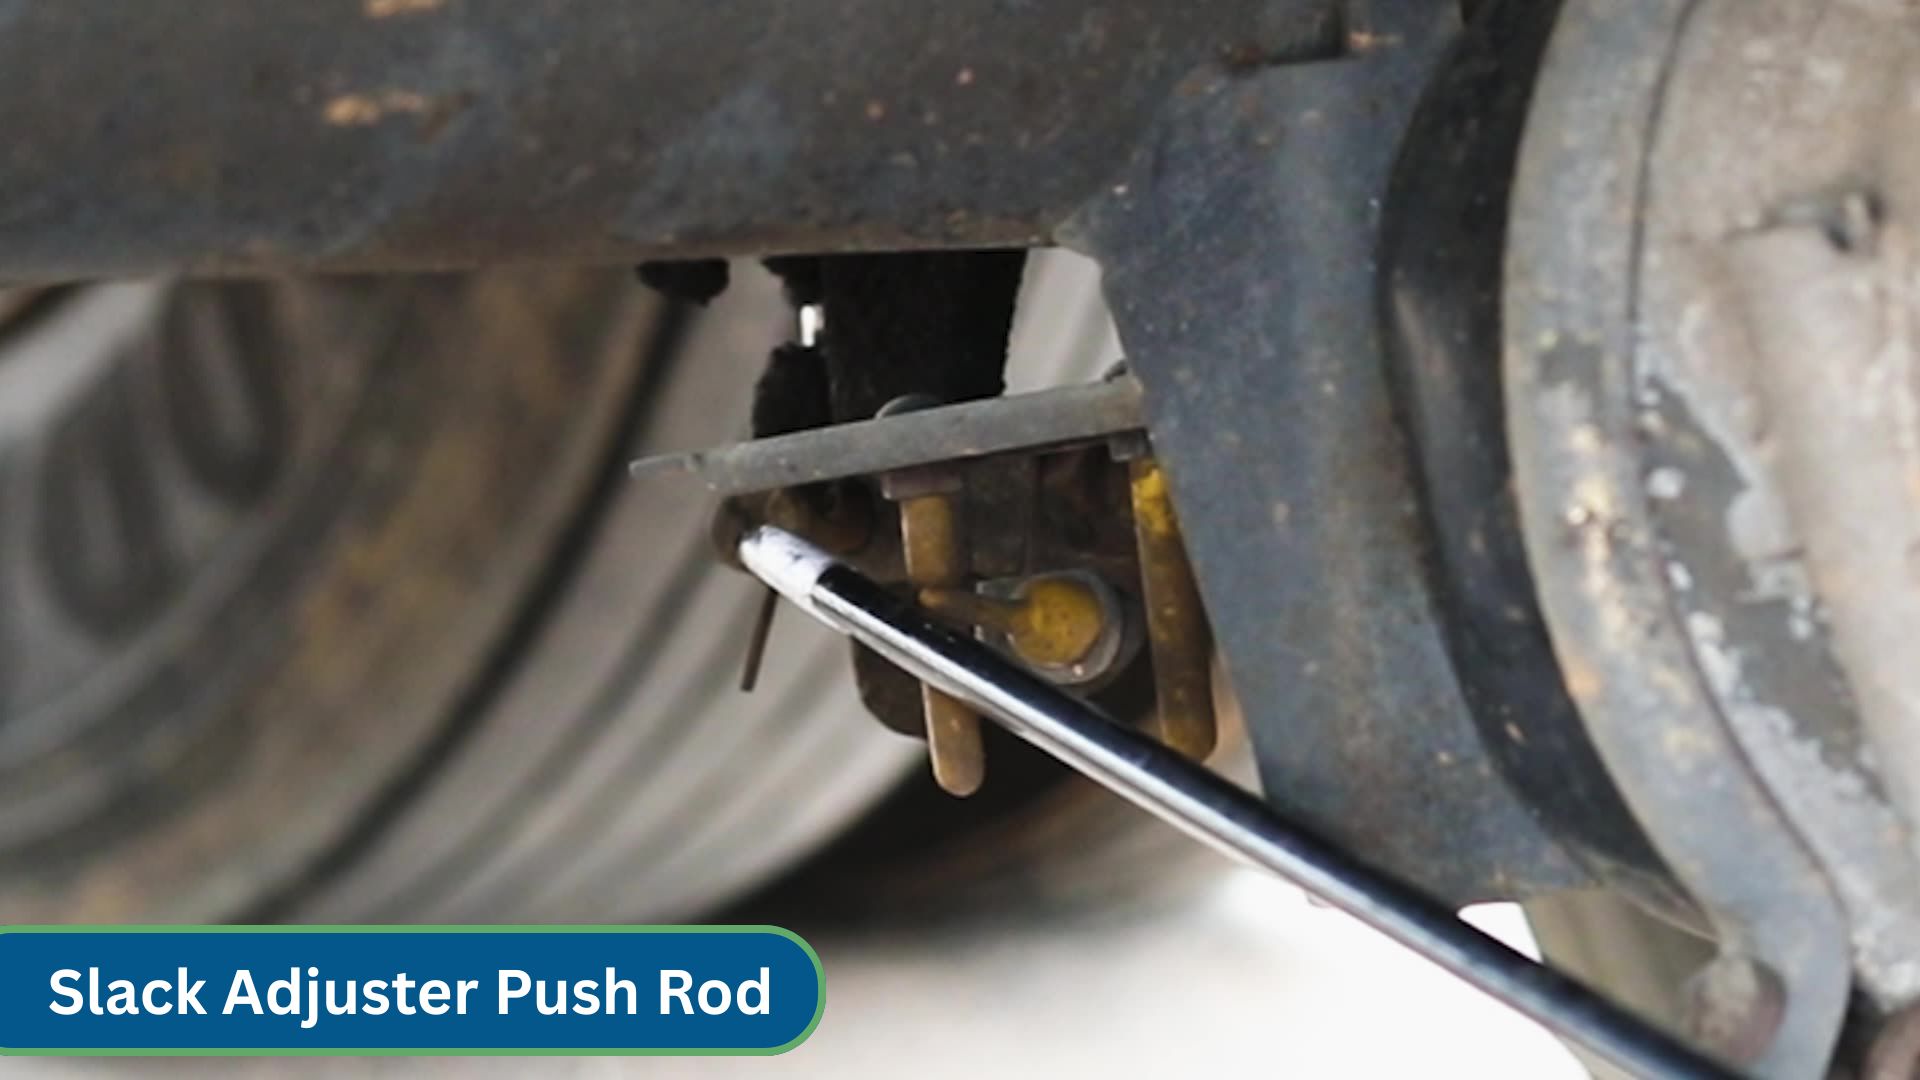
- Check the slack adjuster and push rod. They should not be bent or broken, and should have no loose or missing parts. Pull should not exceed 1 inch — 1 to 2 inches needs adjustment, over 2 inches is out of service.
- Check the brake shoes for oil or grease and confirm at least 1/4 inch of pad. Check the brake drum for cracks, dents, or warping.
Rear of the Trailer
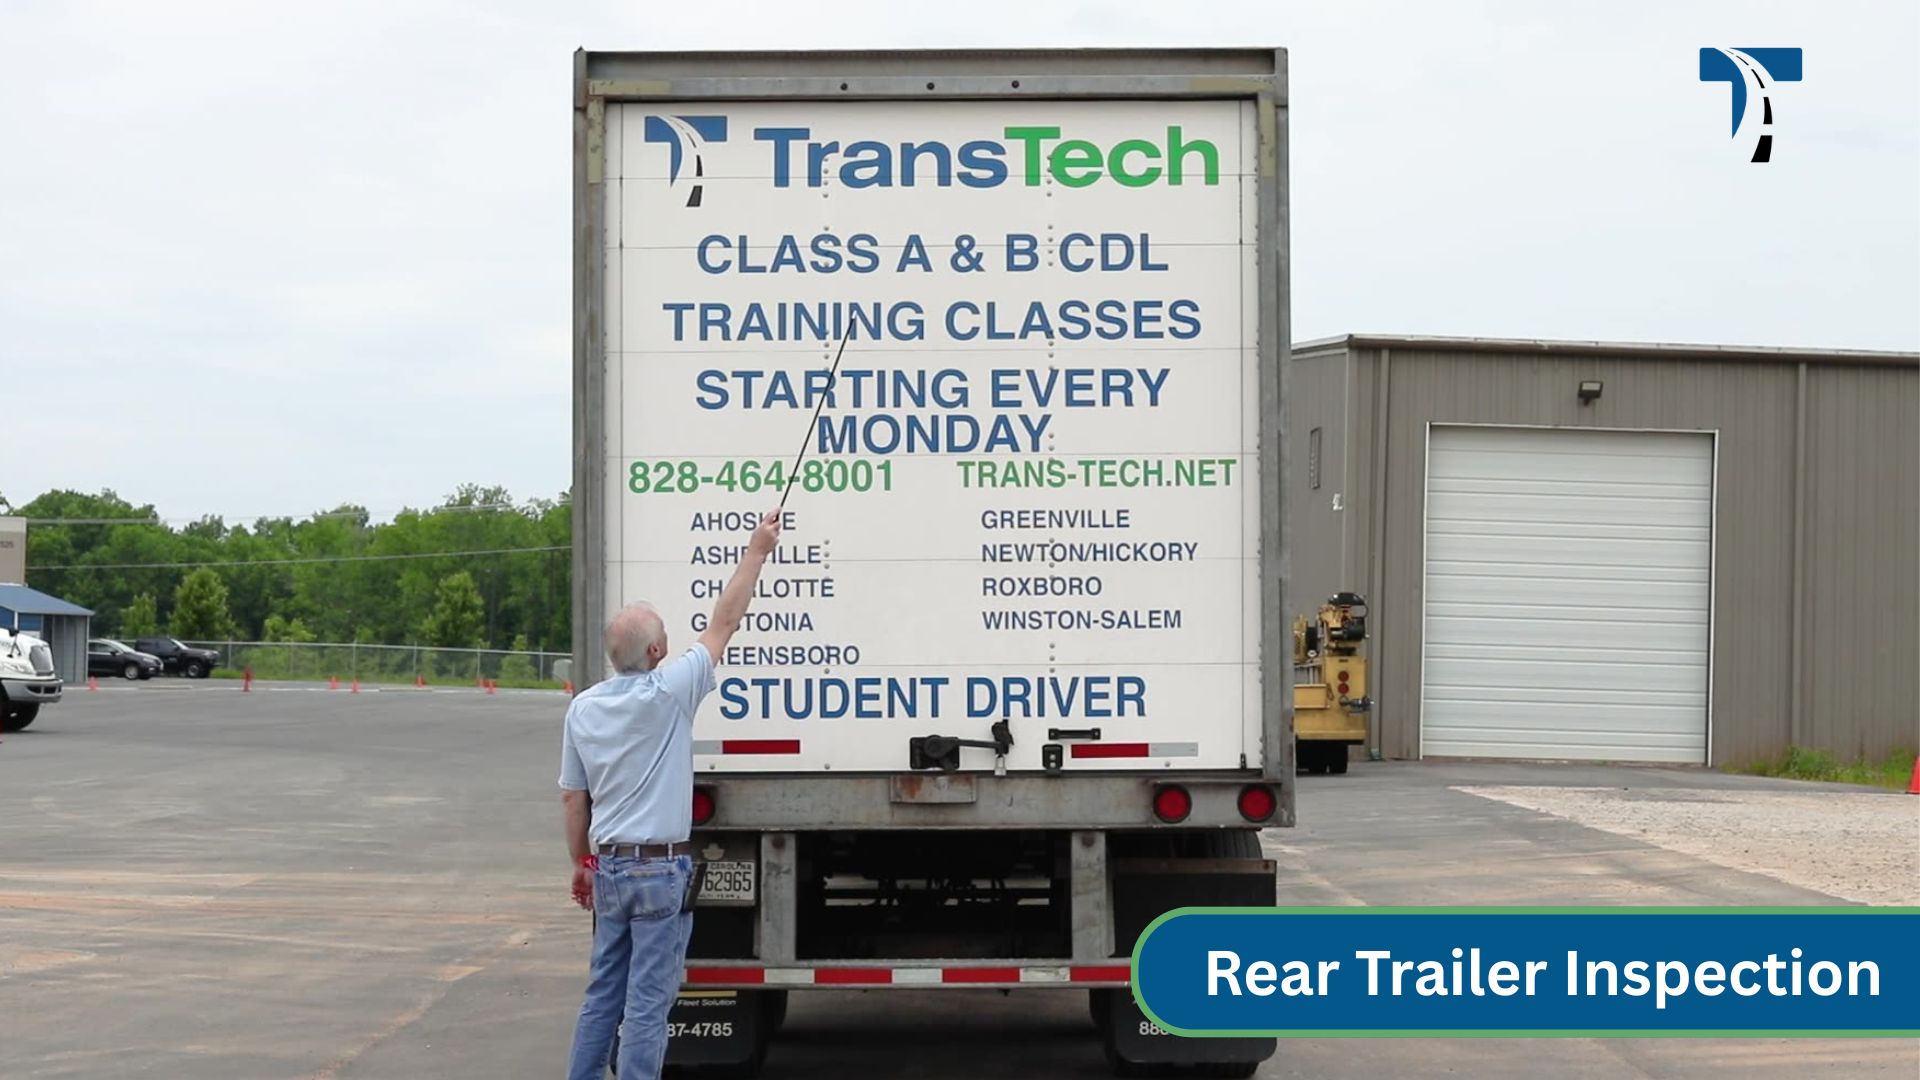
- Check the ABS light. It should be amber in color, securely mounted, and not cracked or broken.
- Check the marker light. It should be red in color, securely mounted, and not cracked or broken.
- Check the mud flaps. They should be securely mounted with no loose or missing bolts.
- Check the rear ID lights. They should be red in color and not cracked or broken.
- Check the trailer door. It should not be damaged and should open and close properly. Confirm that there are two good cables on either side, not frayed.
- Check the door latch. It should open and close properly and lock securely. The rear lights should be red in color, not cracked or broken, and function as tail lights, left and right turn signals, four-way signals, and brake lights.
- Check the DOT bumper. It should not be cracked or broken and should have full DOT tape along its entire length.
Final Walk-Around
- Once you have completed the inspection down the left side, walk down the right side and check for anything different from what you have already inspected.
In-Cab Inspection
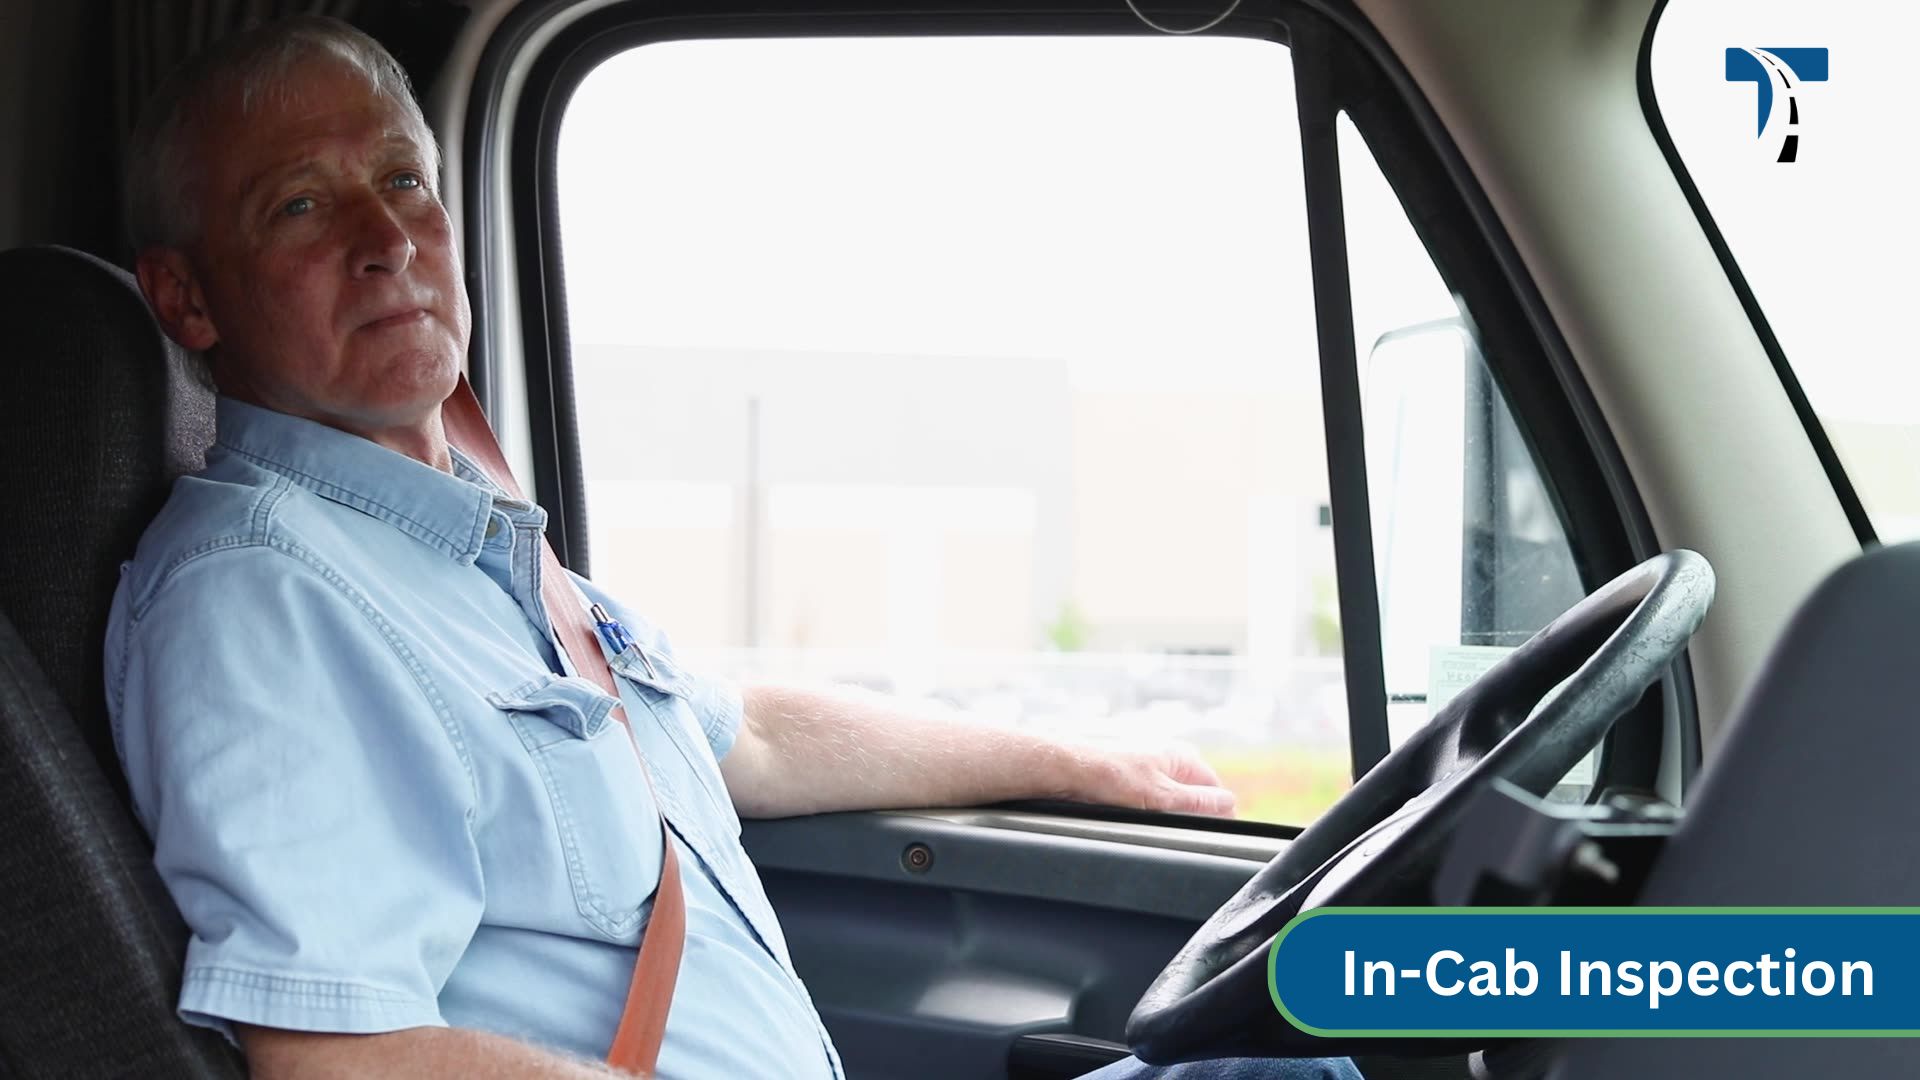
- Check the seat belt. It should not be ripped, frayed, or torn, and should latch properly.
- Check the mirrors. They should not be cracked or broken and should be adjusted to your position as the driver.
- Check the windshield. It should not be cracked or broken, should have no illegal stickers, and should be free of debris.
Safety Start
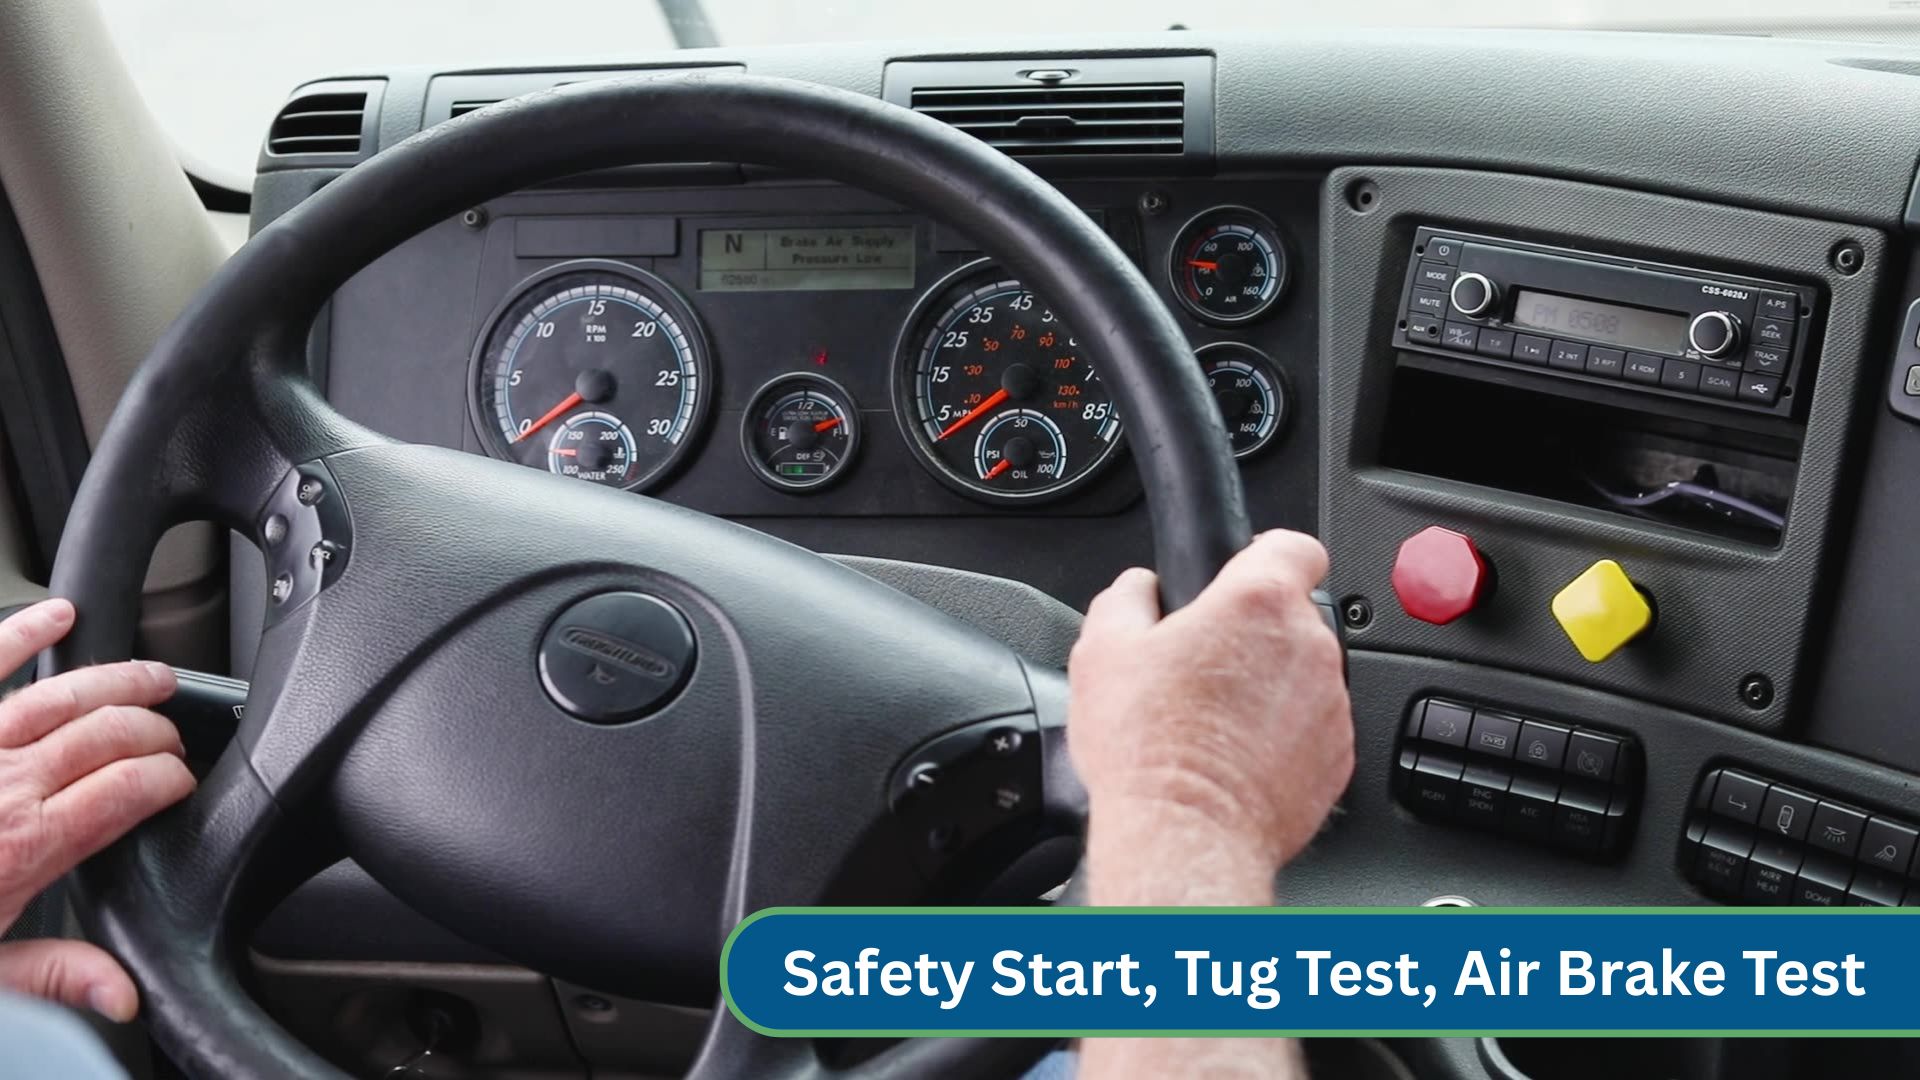
- Before starting, make sure the parking brake buttons are pulled out, the transmission is in neutral, and your foot is on the brake.
- Start the engine and confirm the ABS light comes on and then goes off.
- Check the water temperature gauge and confirm it rises to the normal operating level.
- Check the oil pressure gauge and confirm it rises to normal operating pressure.
- Check the primary and secondary air gauges and confirm they rise to between 100 and 125 PSI.
- Check the voltmeter and confirm it reads between 12 and 14 volts.
- Check all light indicators: left turn signal, right turn signal, four-way flashers, and high beam.
- Test the city horn and the highway horn.
- Test the windshield wipers — confirm there is no metal-to-metal contact with the windshield. Also, test the washer fluid.
- Check the glove box for spare fuses.
Tug Test
- Put the truck in drive, press the tractor brake in, and pull firmly against the trailer brakes.
- Place the truck in neutral, pull the tractor brake, press the trailer brake in, put it in drive, and pull firmly against the tractor brake.
- Place the truck in neutral and press both buttons in. Pull forward, apply the brakes, and confirm the truck does not pull left or right and stops appropriately.
Air Brake Test
- Place the truck in neutral and shut the engine off. Turn the ignition back on.
- Press the brake pedal and hold it for 1 minute. You should not lose more than 4 PSI during that minute.
- Continue pressing the brake to reduce air pressure to approximately 60 PSI. You should hear and see a low-air-pressure audible and visual alarm activate.
- Continue to fan the brakes down from 40 to 20 PSI. The tractor protection valve should pop out, followed by the trailer protection valve.
This concludes the pre-trip inspection. Transtech wishes you good luck on your CDL exam and safe travels as a truck driver.
Resources after you finish your CDL training and testing
- Assistance in getting a job
- Starting a truck driving career in Charlotte
- Driving for Stevens Transport
- Driving for Schneider National
- Driving for TMC Transport
